
In this blog post I will be configuring Virtual Machines Running on VMware Azure Solution can access Azure files over azure private end point. This is a end to end four step process describe as below:
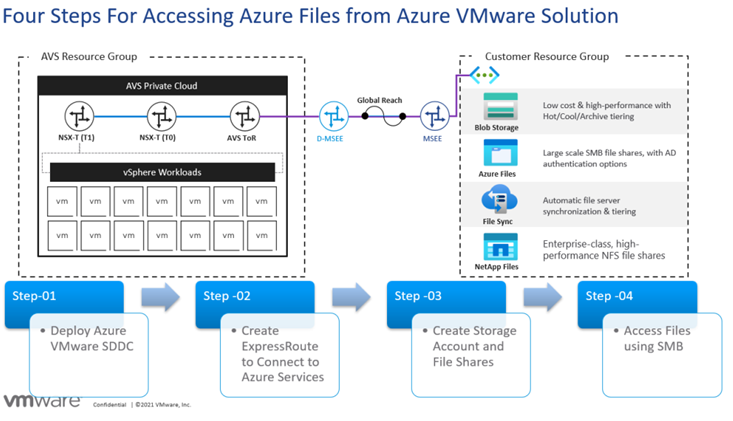
Here is Step-by-Step process of configuring and accessing Azure Files on Azure VMware Solution:
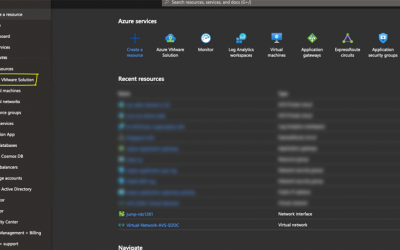
Step -01 Deploy Azure VMware SDDC
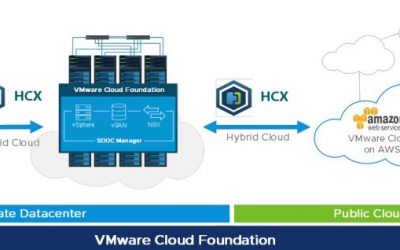
Azure VMware Solution provides customers a private clouds that contain vSphere clusters, built on dedicated bare-metal Azure infrastructure. The minimum initial deployment is three hosts, and additional hosts can be added one at a time, up to a maximum of 16 hosts per cluster. All provisioned private clouds have vCenter Server , vSAN , vSphere , and NSX-T. customers can migrate workloads from your on-premises environments, deploy new virtual machines (VMs), and consume Azure services from your private clouds.
In this blog, I am not going to cover AVS deployment process as this blog post is more focused on Azure Files integration, you can follow below process for the deployment of VMware Azure solution or check official documentation Here
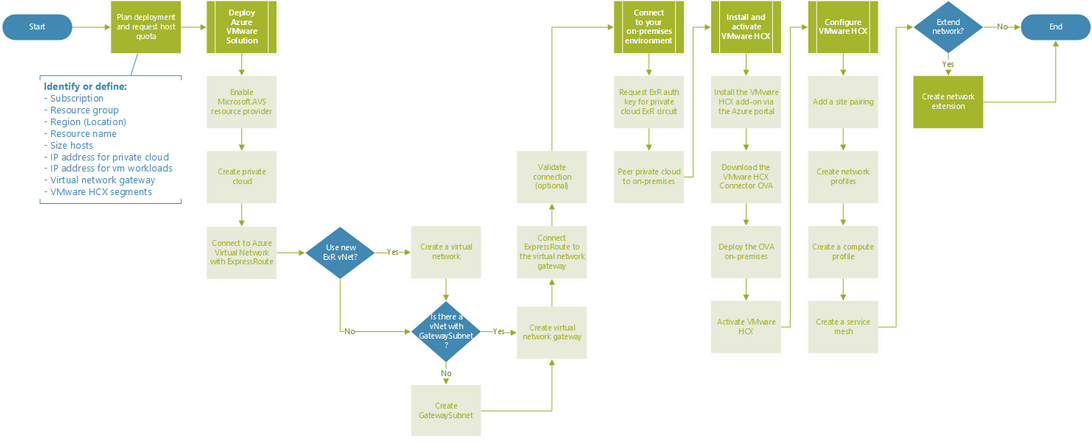
Step -02 Create ExpressRoute to Connect to Azure Native Services
In this section we need to defined whether to use an existing or new ExpressRoute virtual network gateway and follow this decision tree for your AVS to Azure Native Services configuration.
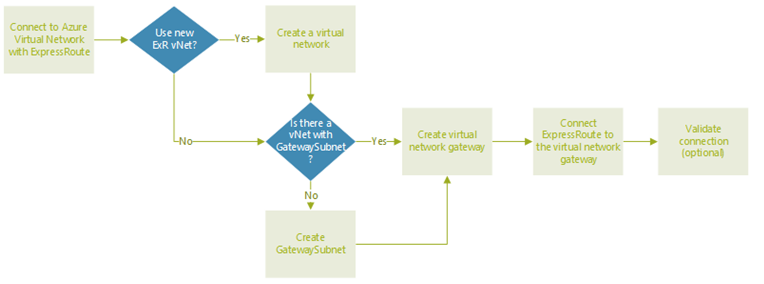
For this blog post, I will create a new vNET and new ExpressRoute and attach that vNET to Azure VMware Solution, so first thing first, Deploy your Azure VMware Solution and once done, go ahead and create an Azure Virtual Network and Virtual Network Gateway
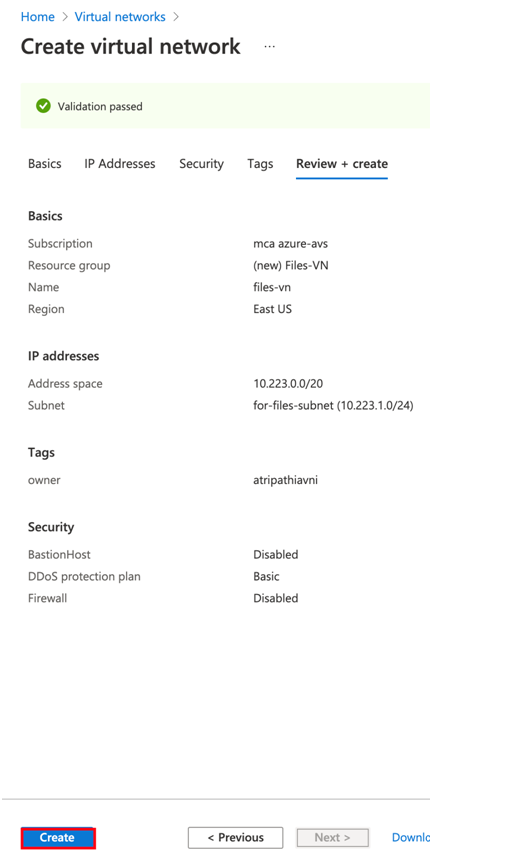
Create Azure Virtual Network
- On the Virtual Network page, select Create to set up your virtual network for your private cloud.
- On the Create Virtual Network page, enter the details for your virtual network.
- On the Basics tab, enter a name for the virtual network, select the appropriate region, and select Next
- IP Addresses. (NOTE:-You must use an address space that does not overlap with the address space you used when you created your private cloud), Select + Add subnet, and on the Add subnet page, give the subnet a name and appropriate address range. When complete, select Add.
- Select Review + create.


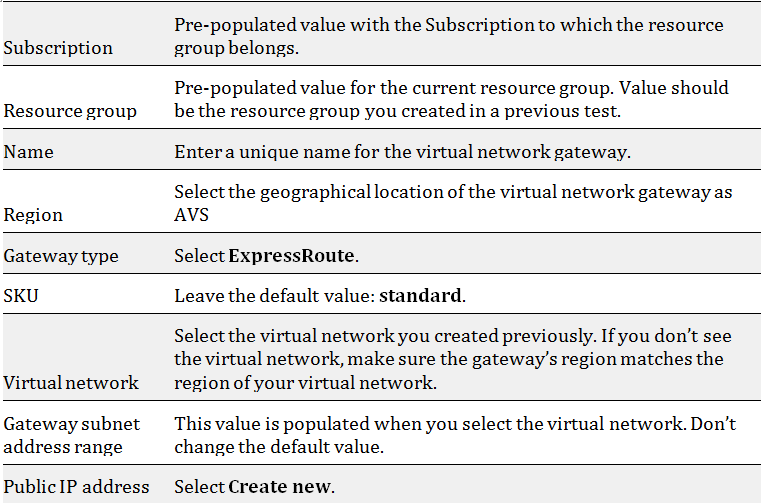
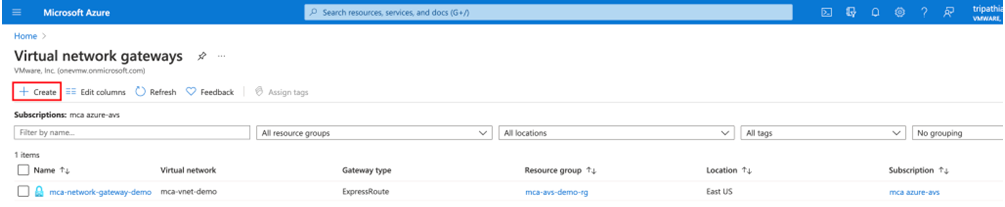
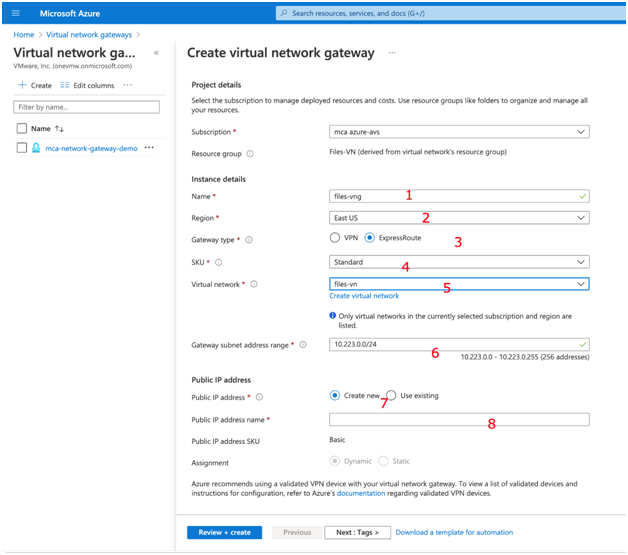
Create An Virtual Network Gateway
Now that we have created a virtual network, we will now create a virtual network gateway.On the Virtual Network gateway page, select Create. On the Basics tab of the Create virtual network gateway page, provide values for the fields, and then select Review + create.
Connect ExpressRoute to the virtual network gateway
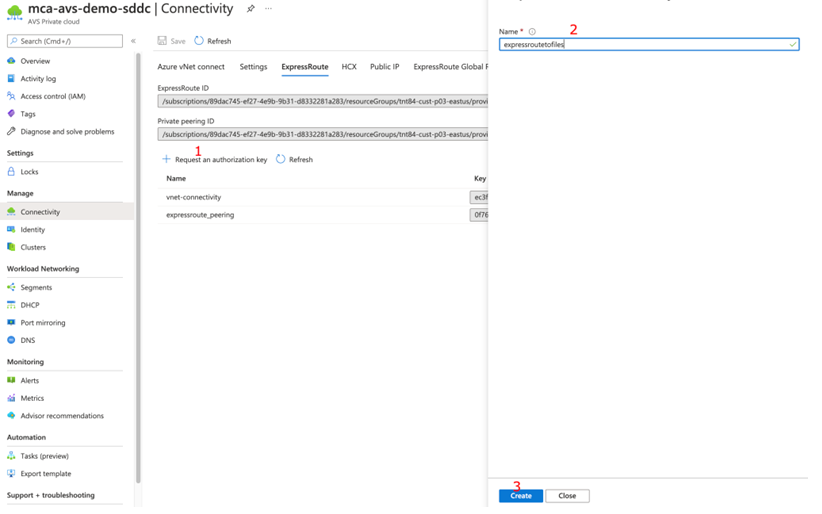
Let's go on the Azure portal, navigate to the Azure VMware Solution private cloud and select Manage > Connectivity > ExpressRoute and then select + Request an authorization key.
Provide a name for it and select Create. It may take about 30 seconds to create the key. Once created, the new key appears in the list of authorization keys for the private cloud.
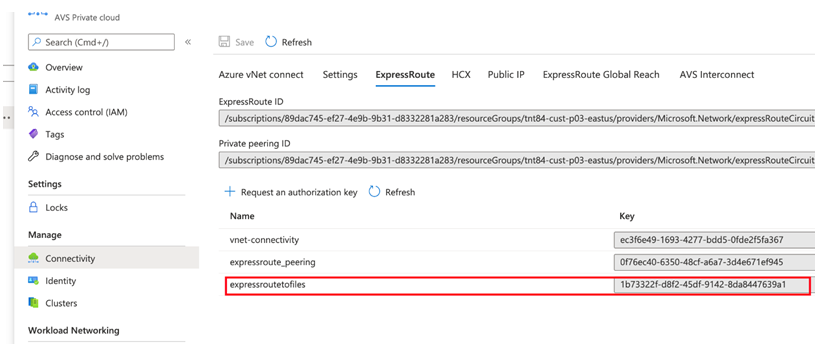
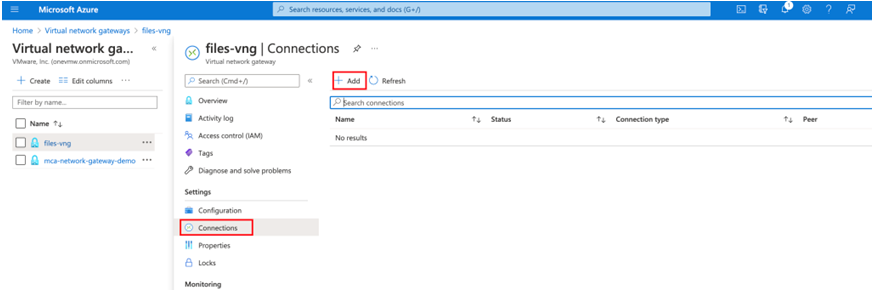
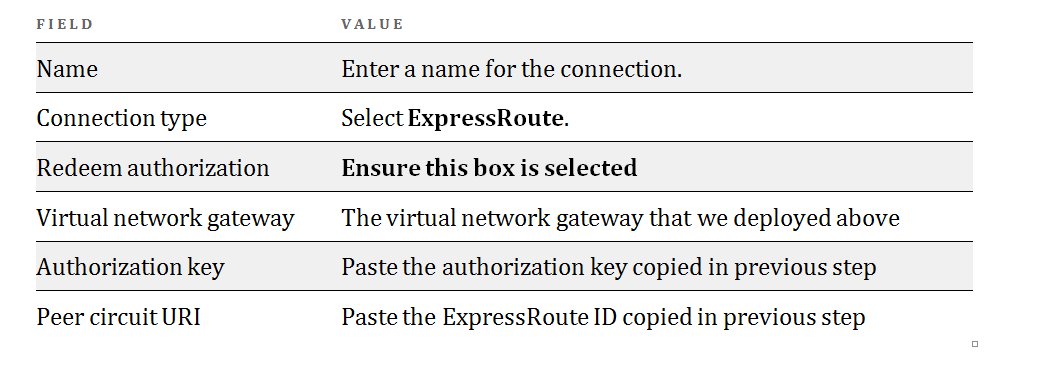
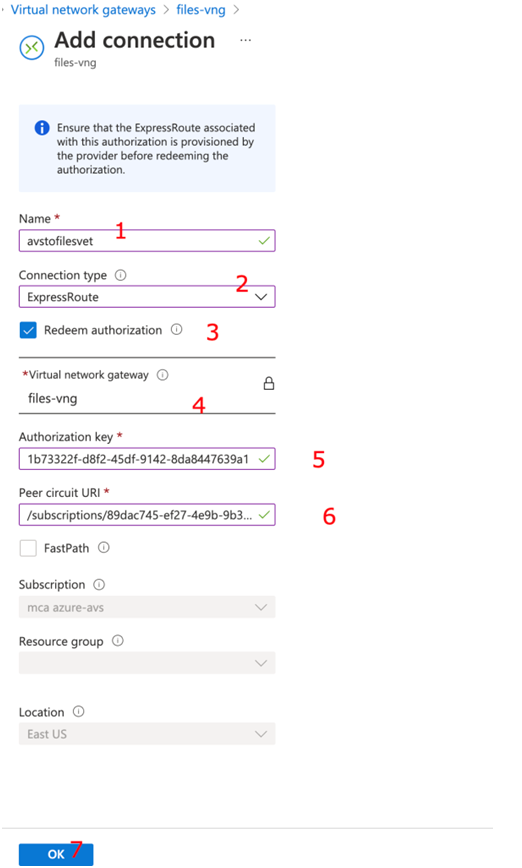
Copy the authorization key and ExpressRoute ID. we will need them to complete the peering, now navigate to the virtual network gateway and select Connections > + Add.
On the Add connection page, provide values for the fields, and select OK.
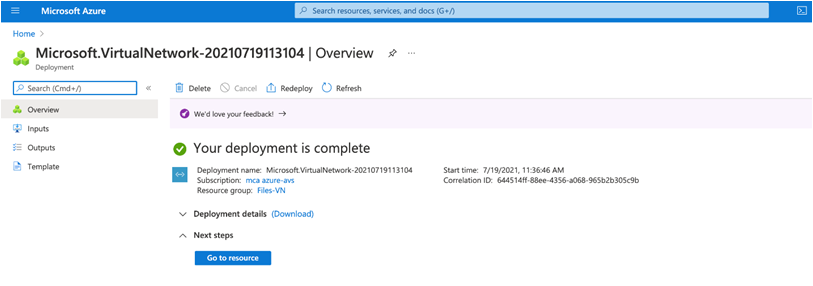
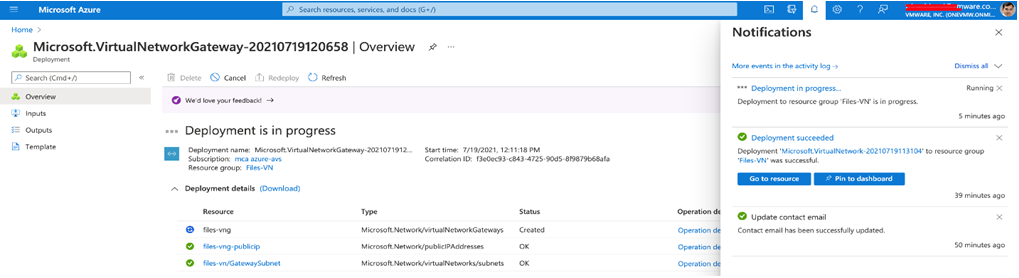
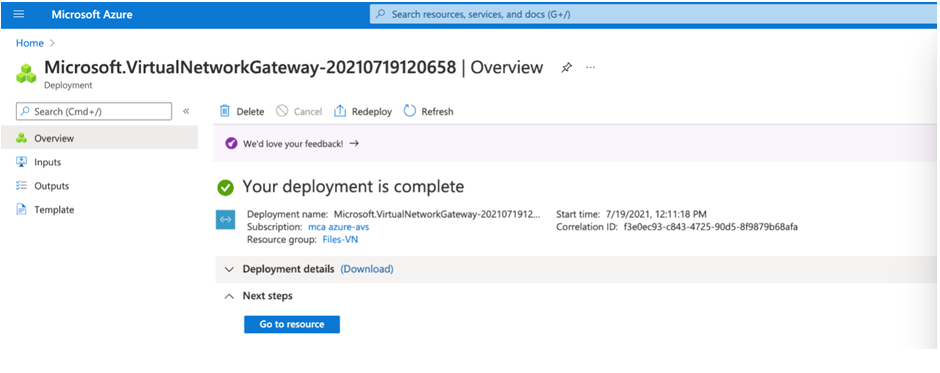
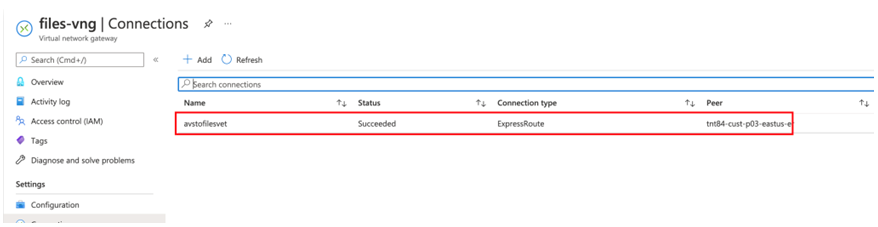
The connection between your ExpressRoute circuit and your Virtual Network is created successfully.
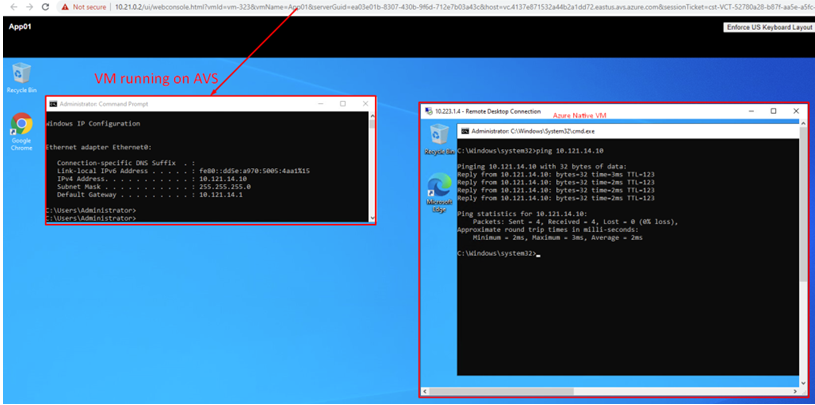
To test connectivity,I have deployed a VM on Azure VMware Solution and one VM in Native Azure and I can reach to both the VMs. I took console of AVS VM and can RDP to Azure Native VM and ping from Azure Native VM to VM deployed in AVS, this ensures that now we have successfully established connectivity between AVS and Azure Native.
Step -03 Create Storage and File Shares
Now lets move to Step -03, Azure file shares are deployed into storage accounts, which are top-level objects that represent a shared pool of storage. This pool of storage can be used to deploy multiple file shares.
Once you are on Azure portal, Click on "Create" under Storage Account and create an storage account in the same region where we have Azure VMware Solution deployed. We will use this storage account to configure "Azure Files" over private link.

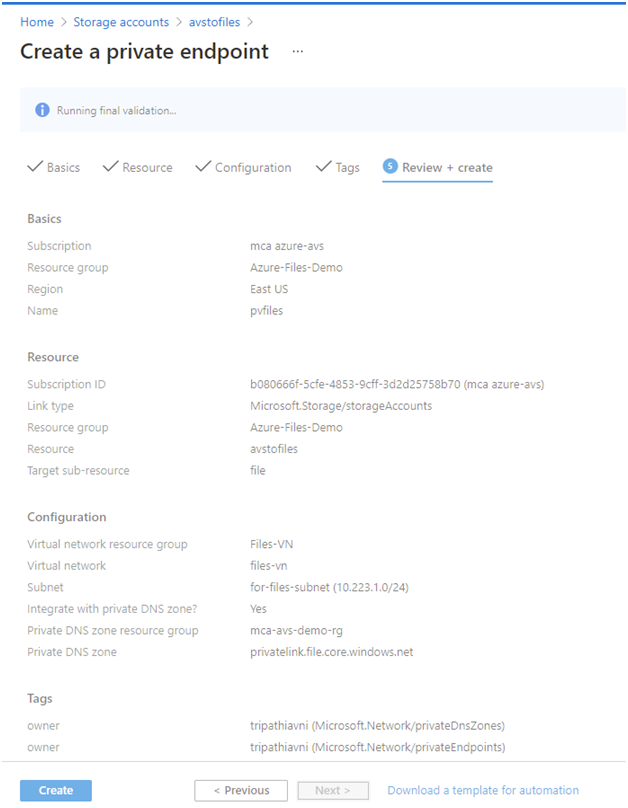
Once Storage Account is created, Lets get in to the networking section of storage account, which allows you to configure networking options. In addition to the default public endpoint for a storage account, Azure Files provides the option to have one or more private endpoints.
A private endpoint is an endpoint that is only accessible within an Azure virtual network and by AVS Network. When you create a private endpoint for your storage account, your storage account gets a private IP address from within the address space of your virtual network, much like how an on-premises file server or NAS device receives an IP address within the dedicated address space of your on-premises network.
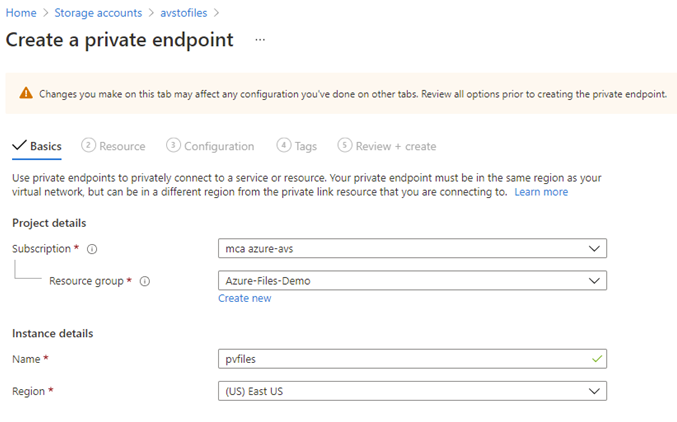
Let's create a "Private EndPoint by clicking on "+ Private endpoint"

Enter basic information as well choose "Region" should be in same region where your AVS has been deployed.
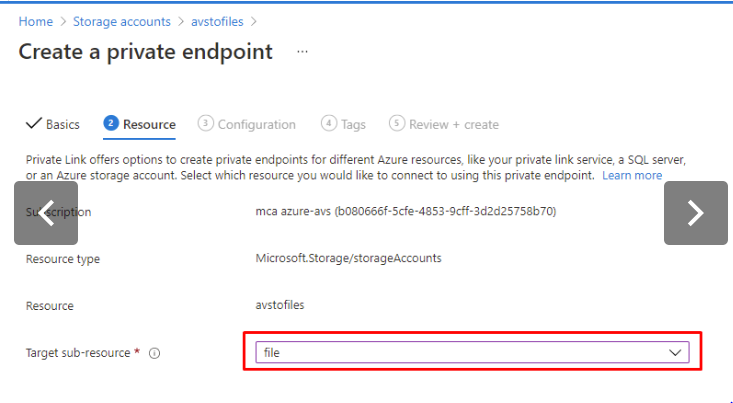
On the Next screen ensure to choose "Target sub-resource" – "file"
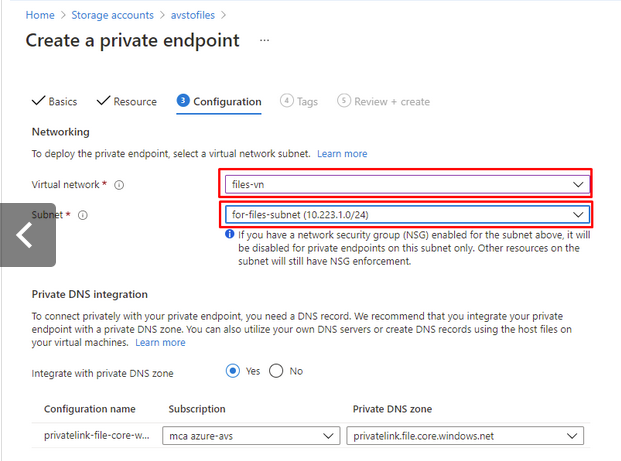
Select Azure Virtual Network and subnet that we created in step -02 and click on create.
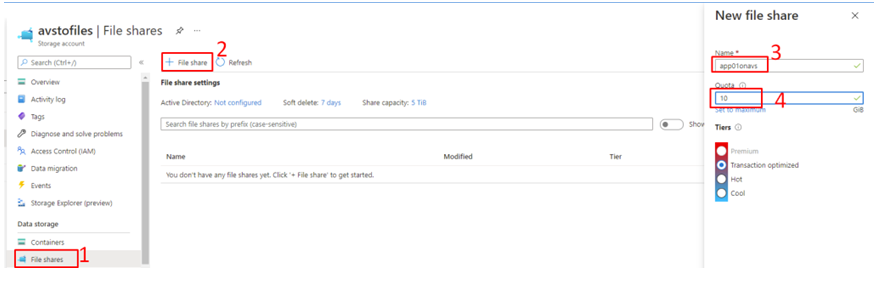
Once in the storage account, select the File shares and click on "+ File share". The new file share blade should appear on the screen. Complete the fields in the new file share blade to create a file share:
- Name : the name of the file share to be created.
- Quota : the quota of the file share for standard file shares; the provisioned size of the file share for premium file shares.
- Tiers : the selected tier for a file share.
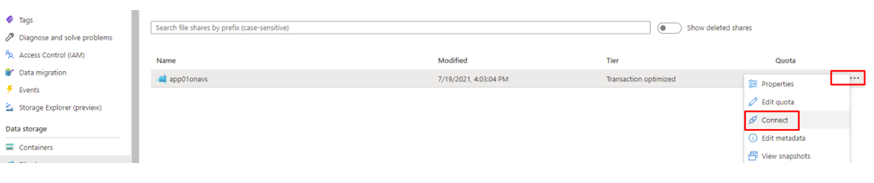
Now share is created, to Mount this share, Select File shares , which we need to mount and then click on " Connect"
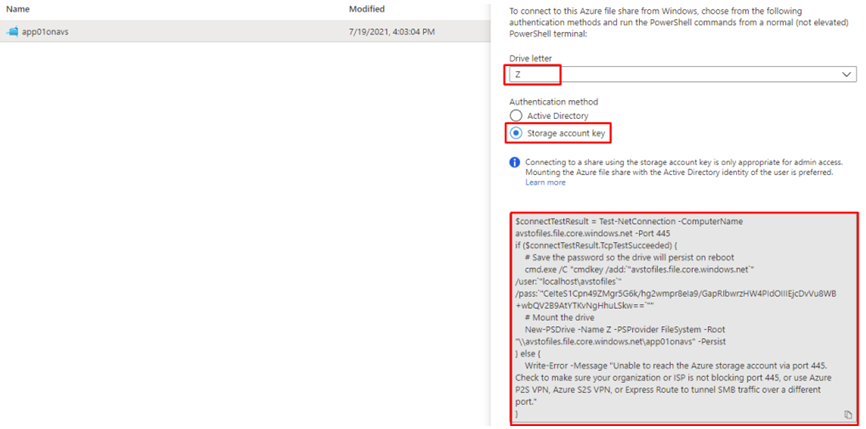
Select the drive letter to mount the share to ,choose Authentication method and Copy the provided script.
Step -04 Access Files over SMB
On the windows server which is running on Azure VMware Solution, Paste the script into a shell on the host you'd like to mount the file share to, and run it.
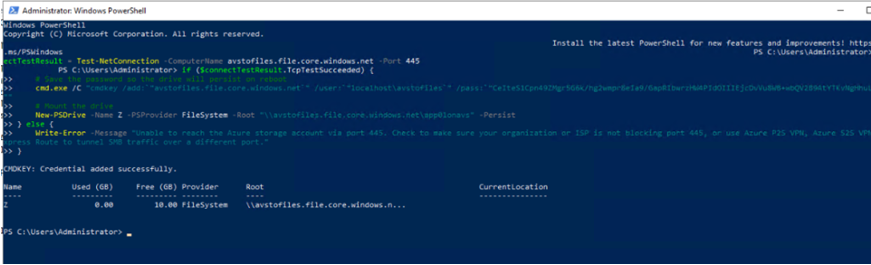
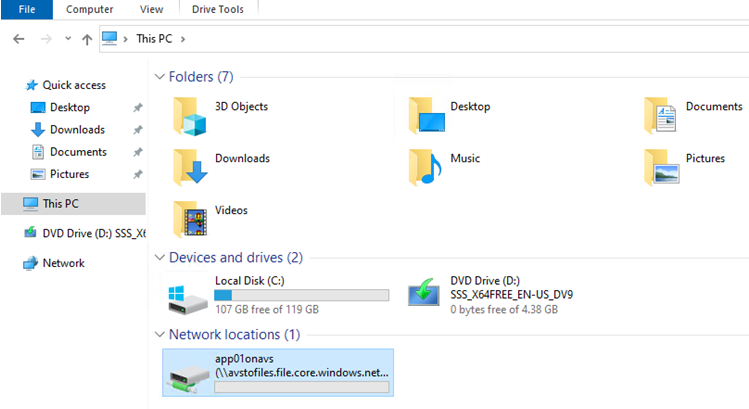
This should mount the "Azure File" to your windows server as Z: drive, which you can use to transfer/store any data that you want to transfer/store.

In case if you are facing issue while accessing file share using Host DNS Name, take private IP of the share connection by clicking on "Network Interface" and copy the private IP
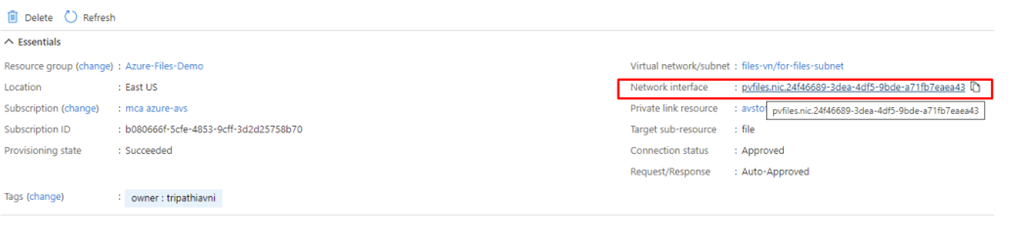
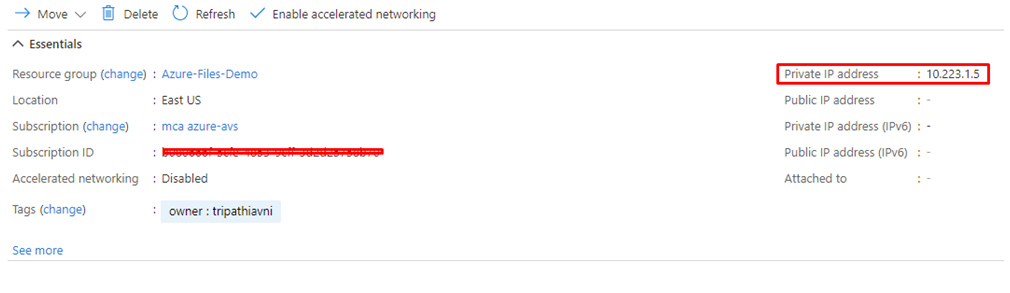
Add this private IP Address in to windows servers Hosts file, then it should work as expected.
This completes integration of Azure VMware Solution to Azure Files (which is azure native service) over the private link, similarly Customers can use many more services of Azure Native those can be easily integrated with Azure VMware Solution.
Avnish is a seasoned IT professional with a demonstrated history of working in the Information Technology with over two decades of experience in multiple industry verticals. Currently working as Senior Cloud Solutions Architect with specialization on VMware Cloud Solutions like vCloud Director based Provider Cloud, VMware Cloud on AWS, NSX-V/T/Cloud & VMware Kubernetes Portfolio based on Tanzu. He posses expertises in Architect, Design & Plan IAAS , PAAS and Container Solutions utilising vCloud Director, NSX-V/NSX-T, VMware Cloud on AWS and VMware Tanzu.
Get connected with Avnish:

0 Comments