
In the previous article, we looked at installing Windows Server 2019 in a virtual box environment.
In this article, we will be configuring Active Directory, DNS AND DHCP for System Center Configuration manager (SCCM).
Active Directory (AD) is a database which holds information on users, computers, and other resources for centralized domain management. AD keeps critical information of any organizational resources including what users and computers there are as objects in the directory service including permissions that are attached to these objects. For example, user information such as job title, phone number and password including permissions. AD makes sure each person is who they claim to be using authentication mechanisms, usually by checking the user ID and password they enter and allowing them to access only the data that they are allowed to by checking against authorization mechanisms.
Domain Name System (DNS) holds information about Domains in internet. There are lots of different devices which communicate with each other using a unique address over the internet called an IP address. To communicate with a website using web browser, we use a domain name (example, stardust.com) and not the IP address. Domain Name System translates human readable domain names (for example, www.stardust.com) to machine readable IP addresses (for example, 192.168.1.222).
Dynamic Host Configuration Protocol (DHCP) allocates IP addresses to computers and other devices in the network which allow these devices to use network services like DNS and NTP through any communication protocol like TCP or UDP. A DHCP server dynamically assigns an IP address and other network configuration parameters to the devices. For example, if an organization has 100's of client computers, its going to be painful configuring IP addresses on each individual machine one by one. System Administrator manages DHCP servers to distribute dynamic IP for all devices automatically when they join the domain.
Domain Controller VM
VM: STDC01
Role: Domain Controller
Memory: 4GB
Storage HDD: 50GB
Static IP: 192.168.1.10
Installing AD DS, DNS and DHCP
These are the roles and features of server.
-
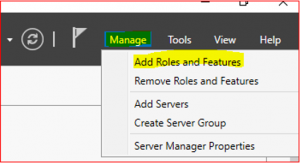
Click Manage on Server Manage
-
Select Add Roles and Features then click Next.
-
Select Role-based or Feature-based installation then click Next.
-
Tick Select a server from the server pool and select STDC01. Click Next.
-
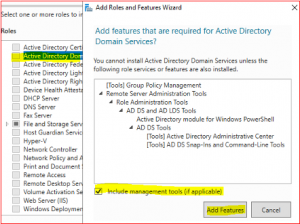
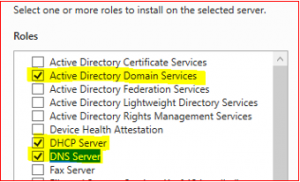
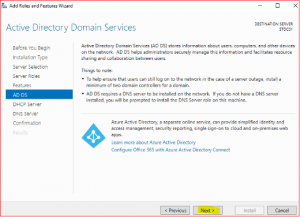
Select Active Directory Domain Service. Then select Add Features.
-
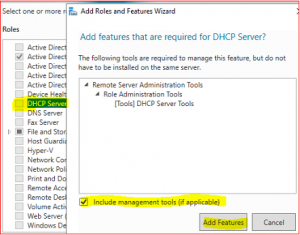
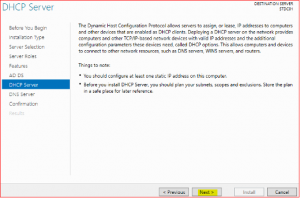
Select DHCP Server and then Add Features.
-
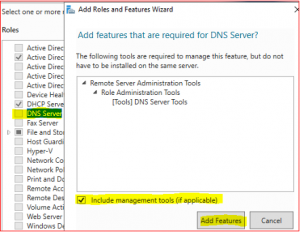
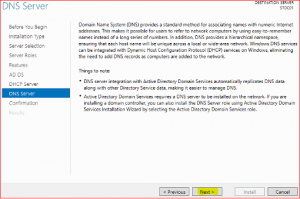
Select DNS Server and then Add Features.
-
Make sure all three Roles and Features are selected.
-
Click Next.
-
Click Next.
-
Click Next.
-
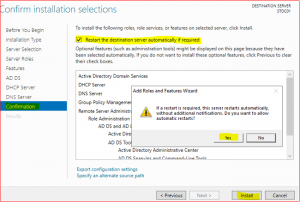
Tick Restart the destination server automatically if required. Then click on Yes and Install.
-
Click on Close after installation has finished.
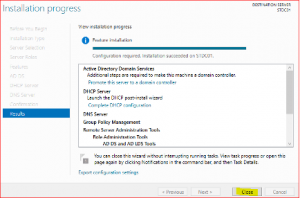
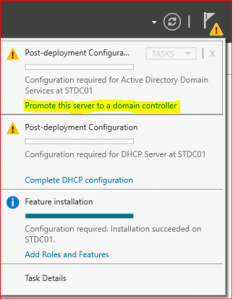
Installation has been completed, we now need to promote this server to a Domain Controller and finalize DHCP configuration.
Promote server to a domain controller
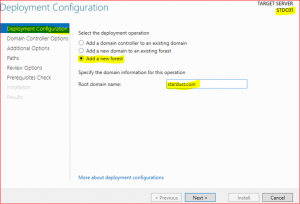
Promoting a server into a domain controller means converting a standalone server to be managed by an Active Directory Domain and Active Directory Forest.
-
Click on Promote this server to a domain controller
-
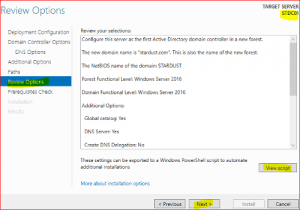
Click on Add new forest and type root domain name e.g., stardust.com
-
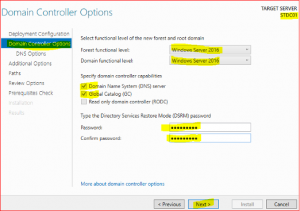
In Domain Controller Options leave everything as is, just type Directory Services Restore Mode (DSRM) password and keep it safe as it might be required in future.
-
Click Next.
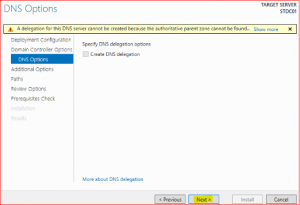
-
Click Next.
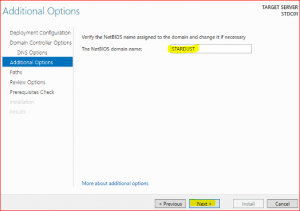
-
Click Next.
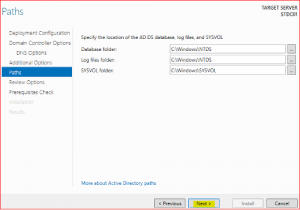
-
Click Next.
-
If all prerequisite checks have passed, click on install.
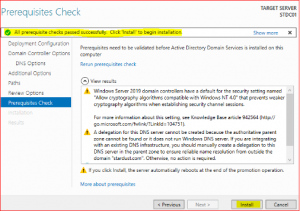
After installation and a reboot, login with System Administrator Credentials.
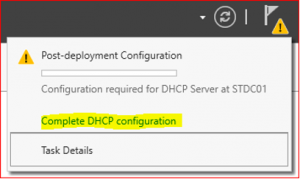
Configure DHCP Server
-
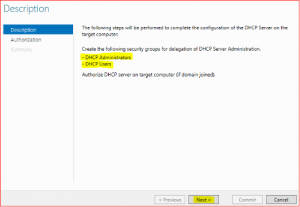
Click on Complete DHCP configuration
-
Leave everything as default and click on Commit and finally on Close

DHCP configuration is now done and now we are going to create DHCP Scope. It is a way of providing valid IP addresses to DHCP clients on a particular subnet.
-
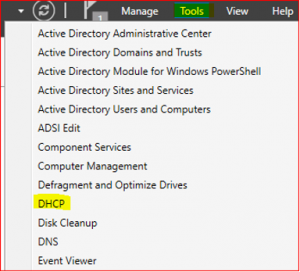
Go to Server Manager Dashboard and click on Tools. Select DHCP.
-
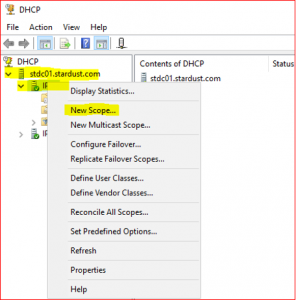
Expand stdc01.stardust.com. Right click on IPv4 and select New Scope. Click on Next.
-
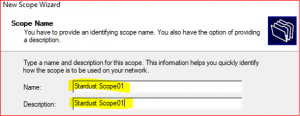
Type Name and Description and click on Next.
-
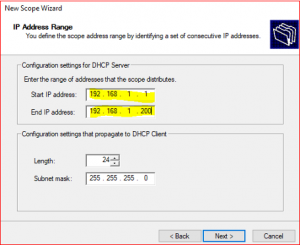
Provide Start IP address : 192.168.1.1 and End IP address: 192.168.1.200 and click on Next.
-
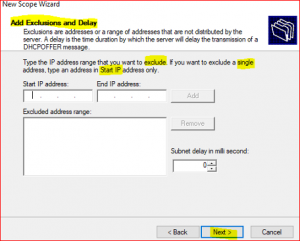
If you have any IP addresses that you don’t want to include in this scope then input that IP or IPs addresses range. Then, click on Next
-
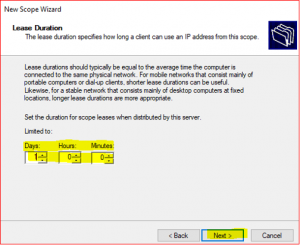
A DHCP server assigns a dynamic IP to a DHCP client computer when they join the domain. IP addresses are leased to clients for a certain time set in DHCP lease duration and it can be Day, Hour and Minutes. After the lease ends, DHCP server will renew the lease with same IP or new IP address for new lease time duration.
-
Select Yes I want to configure these options now and click Next.
-
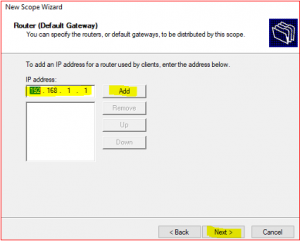
Provide Default gateway information which means your router IP or the gateway.
-
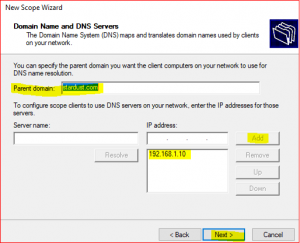
If you have multiple DNS Servers for fault tolerance, you can add them here with server name and IP address, else leave as default but make sure that the Parent domain and IP address provided here is same as your DNS server’s IP address.
-
Leave WINS Server as is because they are not used anymore.
-
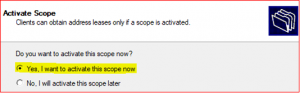
Click on Yes, I want to activate this scope now.
-
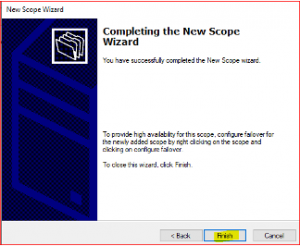
Click on Finish.
Configure Reverse Lookup Zone
Forward DNS works when a user types in the text form of an email address or web page URL. This request is first sent to a DNS server. The DNS server then checks its records and returns the domain's IP address. If unable to locate the domain's IP address, the DNS server forwards the request to another server. e.g., stardust.com > 192.168.1.222. Forward Lookup Zone already created so no need to create new one.
A reverse DNS lookup is a DNS query for the domain name associated with a given IP address. This accomplishes the opposite of the more commonly used forward DNS lookup, in which the DNS system is queried to return an IP address. Reverse lookup zone translates IP addresses into DNS Names. e.g.: 192.168.1.222 > stardust.com.
-
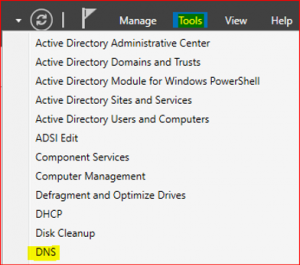
In Server Manager Dashboard select Tools and click on DNS.
-
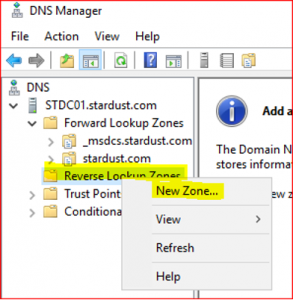
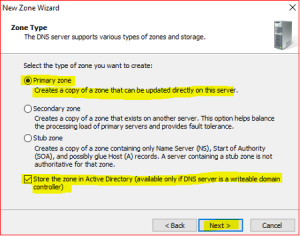
Expand STDC01.stardust.com, right click on Reverse Lookup Zone and select New Zone. Click on Next.
-
Leave defaults in Zone Type.
-
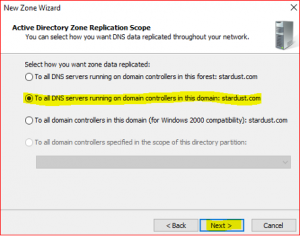
Leave default in Active Directory Zone Replication Scope. Click on Next.
-
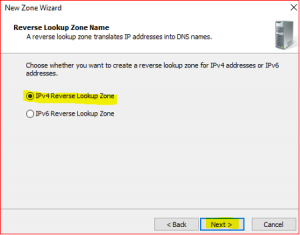
Leave default in Reverse Lookup Zone Name. Click on Next.
-
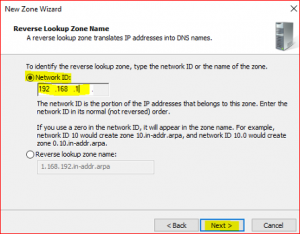
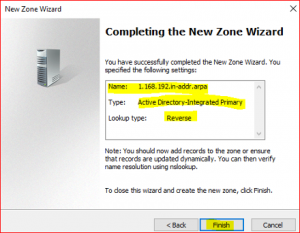
Input Network ID which is first three IP numbers only 192.168.1 not the whole IP address 192.168.1.10.
-
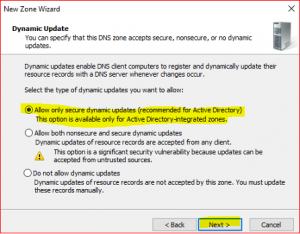
Leave default in Dynamic Update
-
Click on Finish
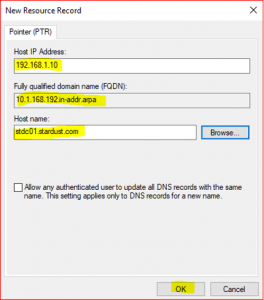
Setting of DNS pointer record (PTR)
A PTR provides the domain name associated with an IP address. It is exactly the opposite of the A record, which provides the IP address associated with a domain name. DNS PTR records are used in reverse DNS lookups.
-
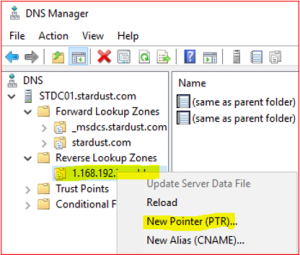
Expand Reverse Lookup Zone, right click on 1.168.192.in-addr.arp and select New Pointer (PTR)
-
Click on Browse and select STDC01.stardust.com.
- Double click on Forward Lookup Zone and then double click on stardust.com and then select stdc01
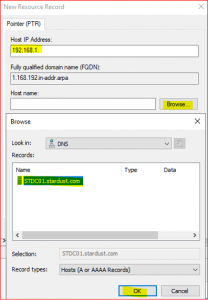
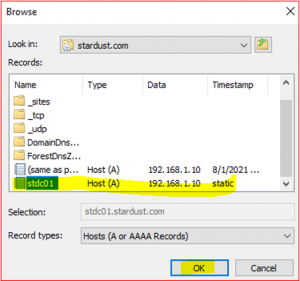
After completing these steps, you will find Host IP address and Host name as below:
Host IP Address: 192.168.1.10
Host name: stdc01.stardust.com
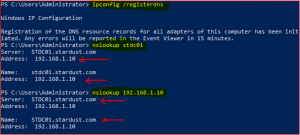
We have successfully created a PTR record and now its time to check both Forward and Reverse lookup zones.
Open Powershell or Command Prompt and type command as per below:
Creating User, Group and Organizational Unit
Active Directory Users and Computers (ADUC) is a management console which allows system administrators to administer objects (users, computers), Organizational Units (OU) including their attributes. System administrators configure authentication and authorization mechanisms for AD objects through ADUC snap-in console.
We are going to create two users as below:
-
SC_Admin (This is the Main Administrator who performs sys admin jobs)
-
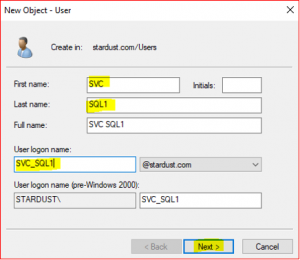
SVC_SQL1 (This is the Service account which performs SQL task)
-
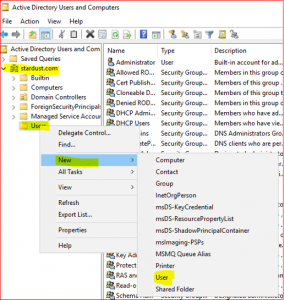
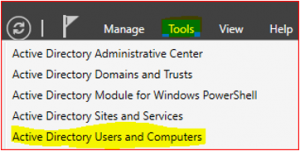
In Server Manager Dashboard select Tools and click on Active Directory Users and Computers.
-
Expand stardust.com, right click on Users and select New. Click on User.
-
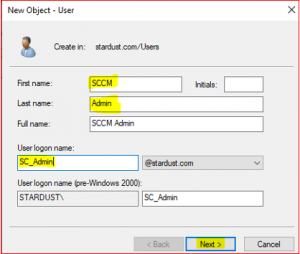
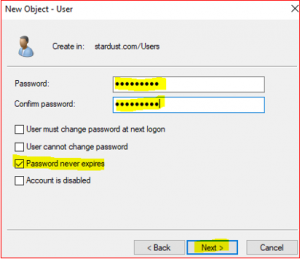
Type the details for SCCM Administrator as per below,
Lets apply Domain Administrator roles to the SCCM_Admin account,
-
In Server Manager Dashboard select Tools and click on Active Directory Users and Computers.
-
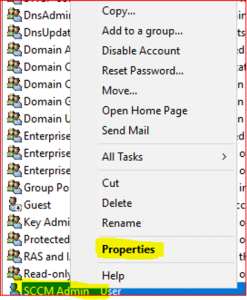
Expand stardust.com, right click on Users, right click on SCCM_Admin. Select Properties.
-
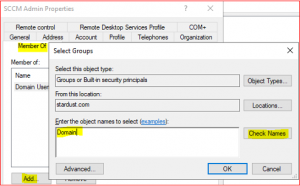
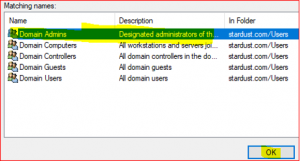
Select Member of Tab, click on Add and enter Domain for the object name.
-
Click on Check Names, select Domain Admins and click Ok.
-
Repeat the above steps for creating Service account user (SVC_SQL1) except the user information,
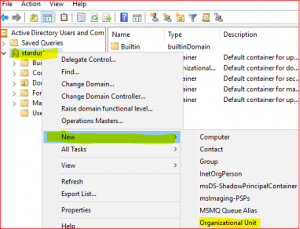
Now we are going to create an Organizational Unit (OU) for,
- Sydney Workstation
- Canberra Workstation
- Melbourne Workstation
-
In Server Manager Dashboard select Tools and click on Active Directory Users and Computers.
-
Select New, select Users, select Organizational Unit. Type name Sydney Workstation. Click on Ok
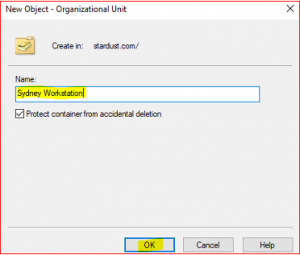
Now repeat the same steps for Canberra Workstation and Melbourne Workstation.
Create GPO for File Share and Printer Sharing and WMI (Windows Management Instrumentation)
Group Policy Object (GPO) is storage of multiple policy settings which defines system behavior, application settings, security settings and assigned applications. For example, we can set a particular time for computer startup and shutdown. Microsoft provides a program snap-in that allows you to use the Group Policy Management Console (GPMC).
WMI is a Microsoft Management Toolkit. It contains a bunch of tools and extensions which provide information about the desktops computer and servers located on the network. Administrators can also extend the capability of the framework by writing scripts in VBScript or PowerShell.
There will be two Inbound and Outbound Rules for the purpose of SSCM configuration.
-
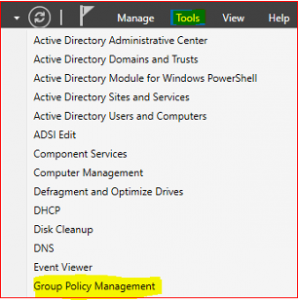
In Server Manager Dashboard select Tools and click on Group Policy Management.
-
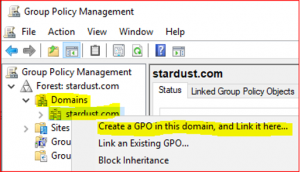
Expand Forest:stardust.com, expand Domains, right click on stardust.com and select Create a GPO in this domain, and Link it here…
-
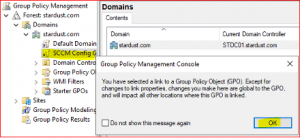
Type a name for new GPO and click on OK.

-
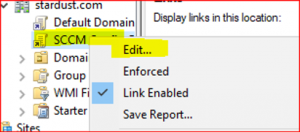
Expand stardust.com to see new blank GPO. Right click on SCCM Config GPO and select Edit
-
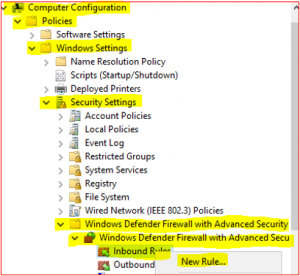
Expand Computer Configuration, Policies, Windows Settings, Security Settings, Windows Defender Firewall with Advance Security, Windows Defender Firewall with Advance Security and click on Inbound Rules and select New Rule.
Setting up Predefined Rules
-
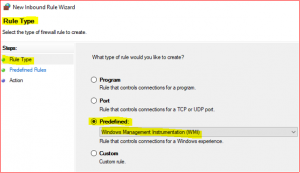
Select Predefined, click Drop Down Menu, select File and Printer Sharing and click Next.

-
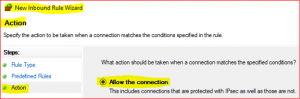
In Predefined Rules accept default click on Next, select Allow the connection and click on Finish
Repeat above for WMI Inbound Rules except below,
-
Select Predefined, click Drop Down Menu, select Windows Management Instrumentation (WMI)
-
In Predefined Rules accept default click on Next, select Allow the connection and click on Finish
Please repeat the same steps again for Outbound Rules for File and Printer Sharing and WMI
- Right click on Outbound Rule > New Rules and follow Setting up Predefined Rules - follow above procedures.
We have successfully created GPO (SCCM Config GPO) with Inbound and Outbound Firewall Rules.
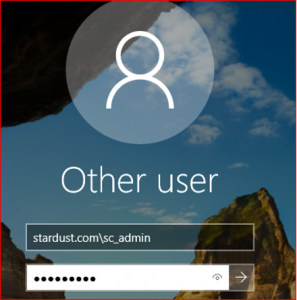
Login to stardust.com with sc_admin credential:
We are now at the end of part 2. We have successfully setup AD, DNS, DHCP, Reserve lookup zone, OU, GPO and Users as part of this article. In the next one, we will be setting up an SQL server for SCCM.


0 Comments