Amazon VPC (Virtual Private Cloud) is a virtual network infrastructure like a physical datacenter, which provides network connectivity to all the resources deployed in that VPC. There are few key concepts for VPCs which you should understand:
- VPC- Virtual Private Cloud
- Subnet
- Route table
- Internet Gateway
- VPC endpoint
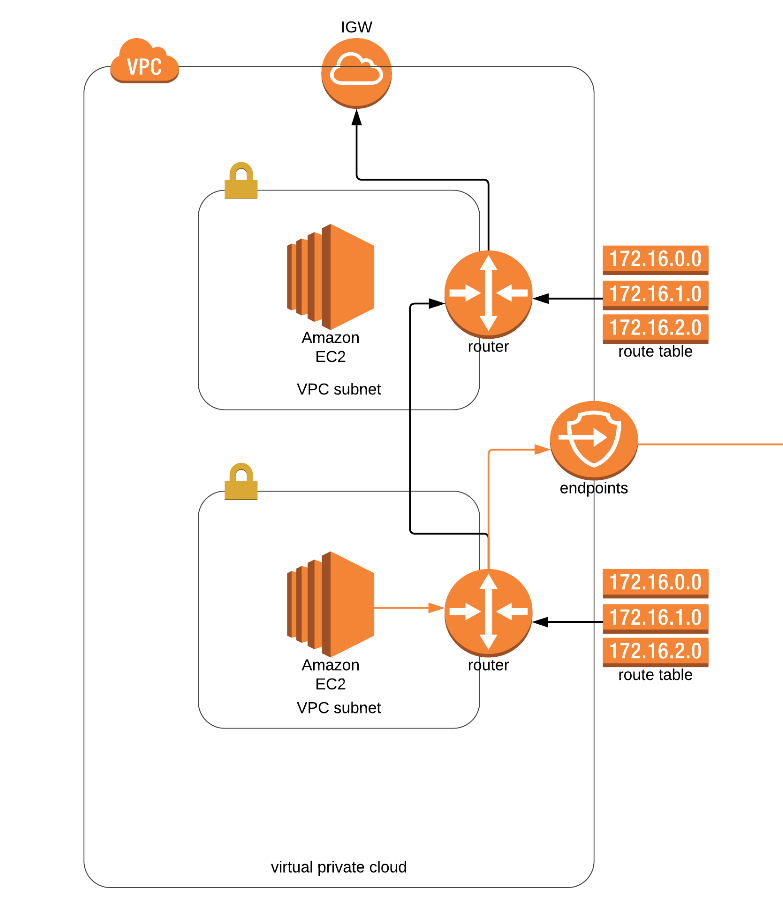
Figure 1 : AWS VPC
There are two subnets in a VPC as shown in figure. 1, one subnet has route to internet via IGW (Internet gateway) and another subnet is private (doesn’t have access to internet). But, resources inside private subnet can access public services like S3 without using IGW (without going through internet), using endpoints (uses AWS backbone infrastructure).
Creating VPC
There are 4 ways to create, access, and manage a VPC and they are:
- AWS Management Console – provides web interface
- AWS Command Line Interface (AWS CLI)
- AWS SDKs
- Query API
Creating a VPC using Management Console
First, to access AWS Management console you need to have an AWS Account ID. If you don’t have an AWS Account ID then you can sign up with AWS using this link or https://portal.aws.amazon.com/billing/signup#/start. If you already have AWS Account ID, then follow the steps:
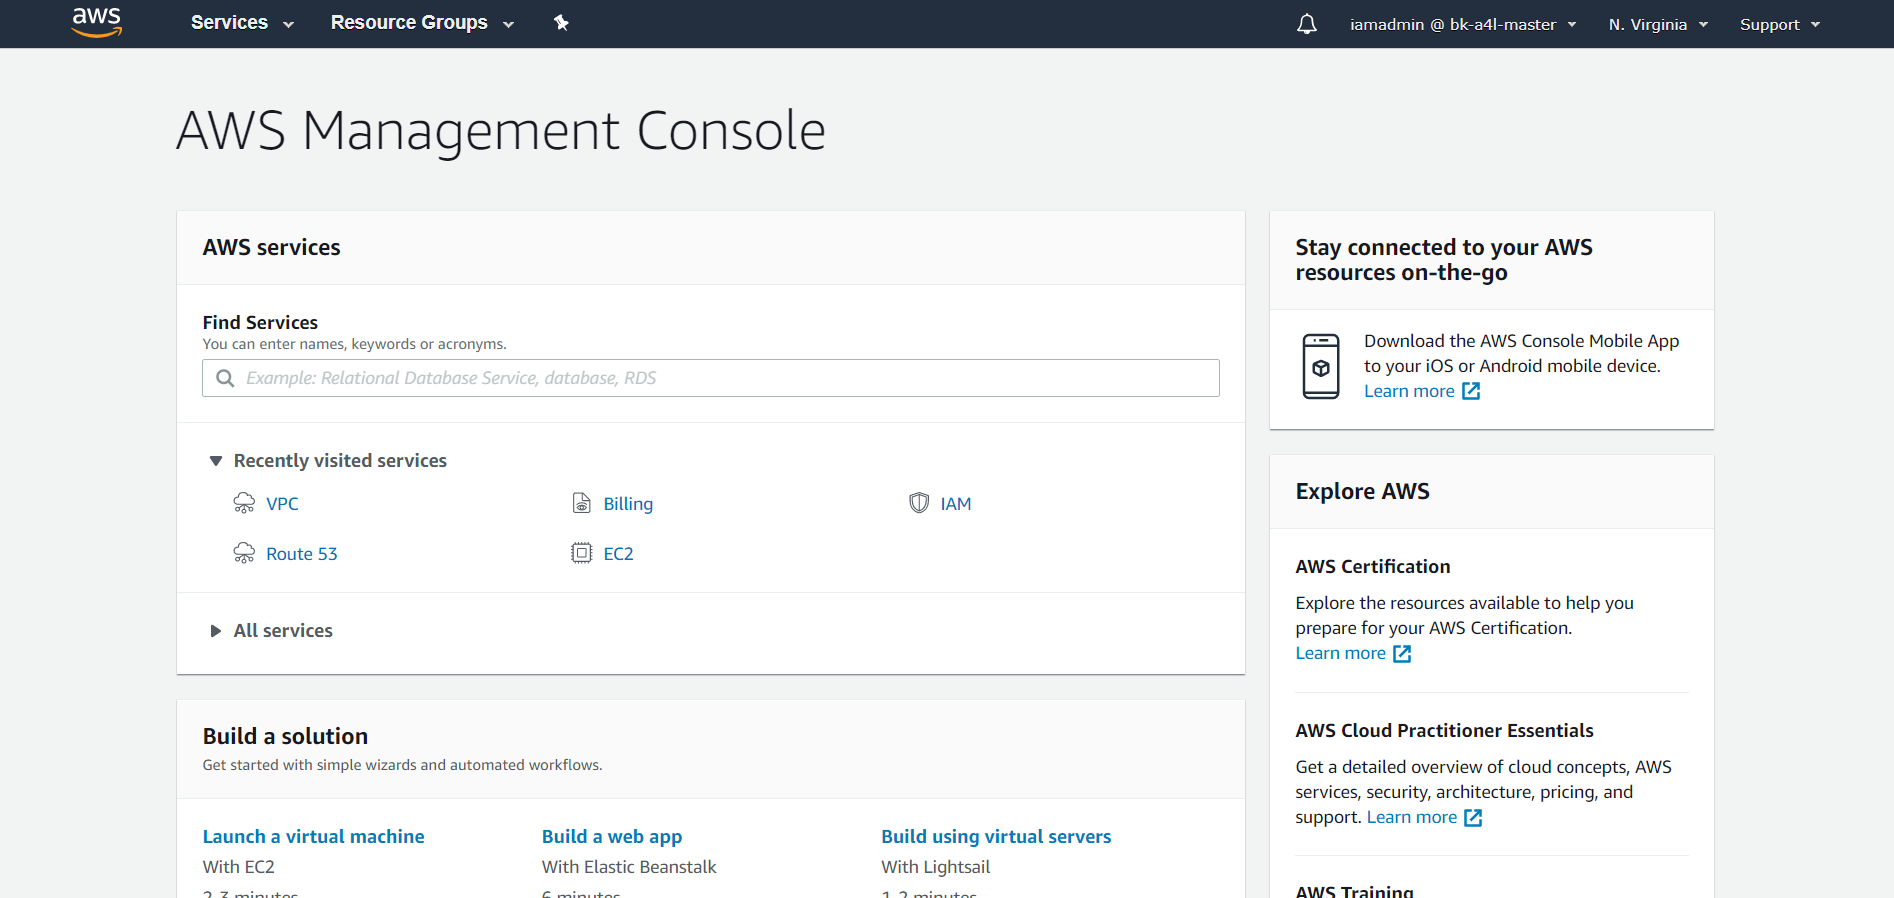
1. Login to AWS Management console which looks like this.
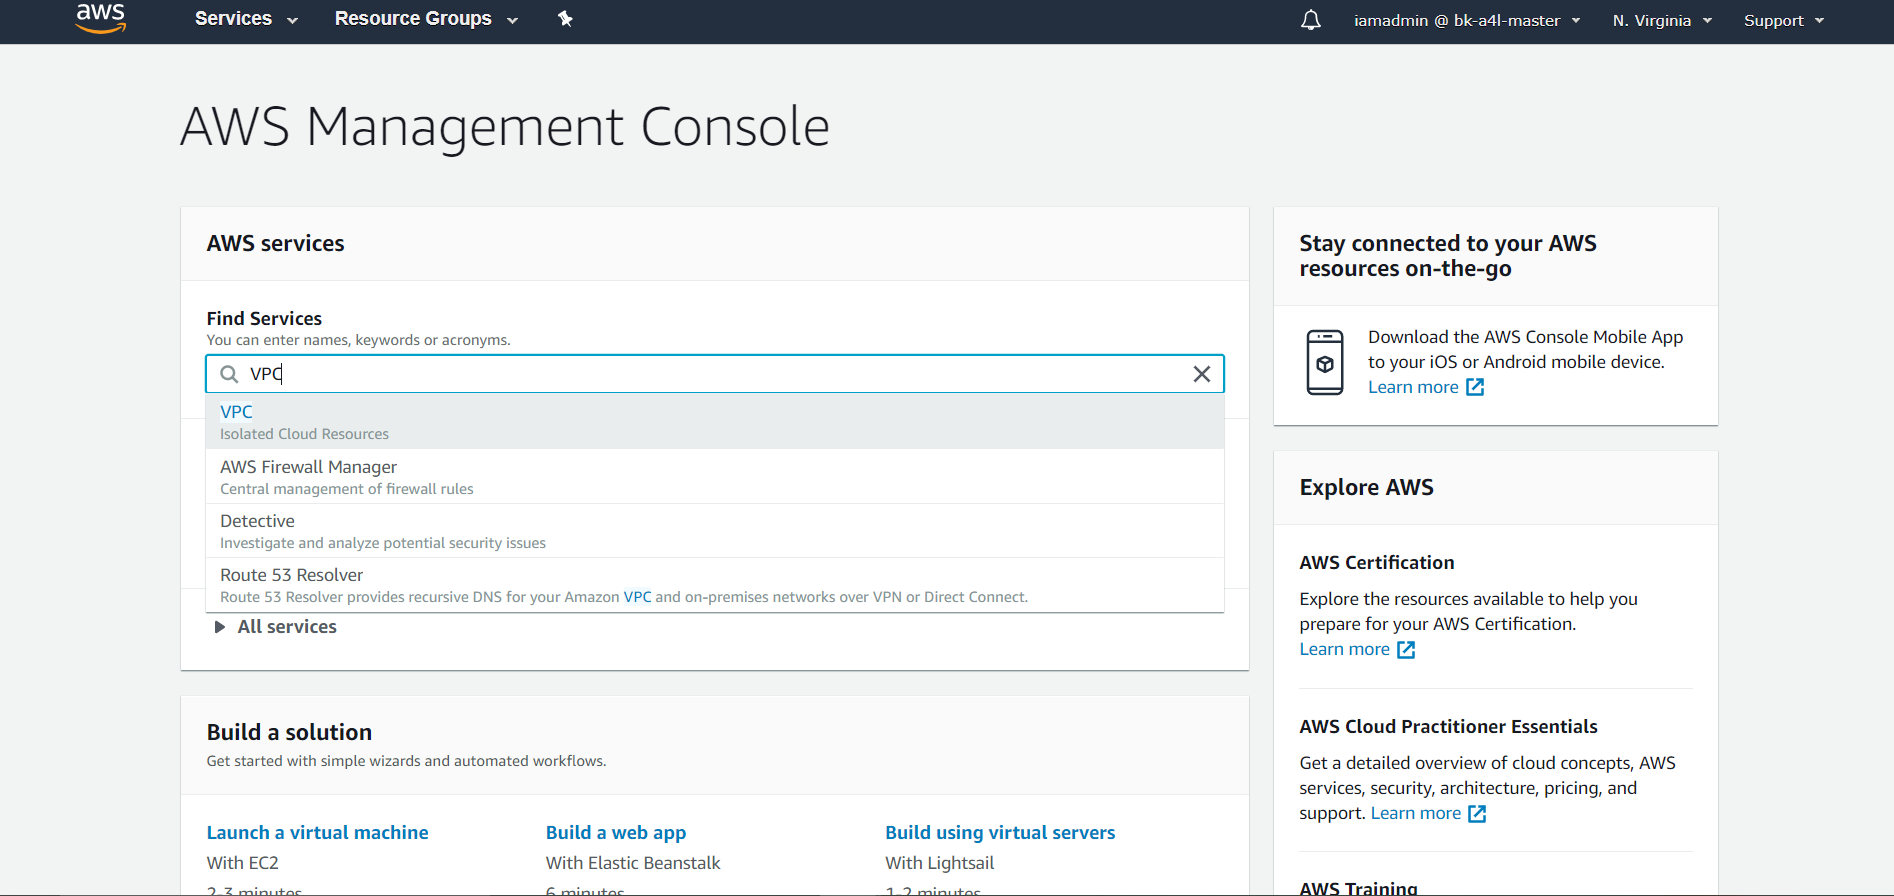
2. To go to VPC dashboard, you can either click on Services drop-down menu and search or type VPC on find ‘services’ search bar.
3. After clicking on VPC you will see a ‘VPC Dashboard’.
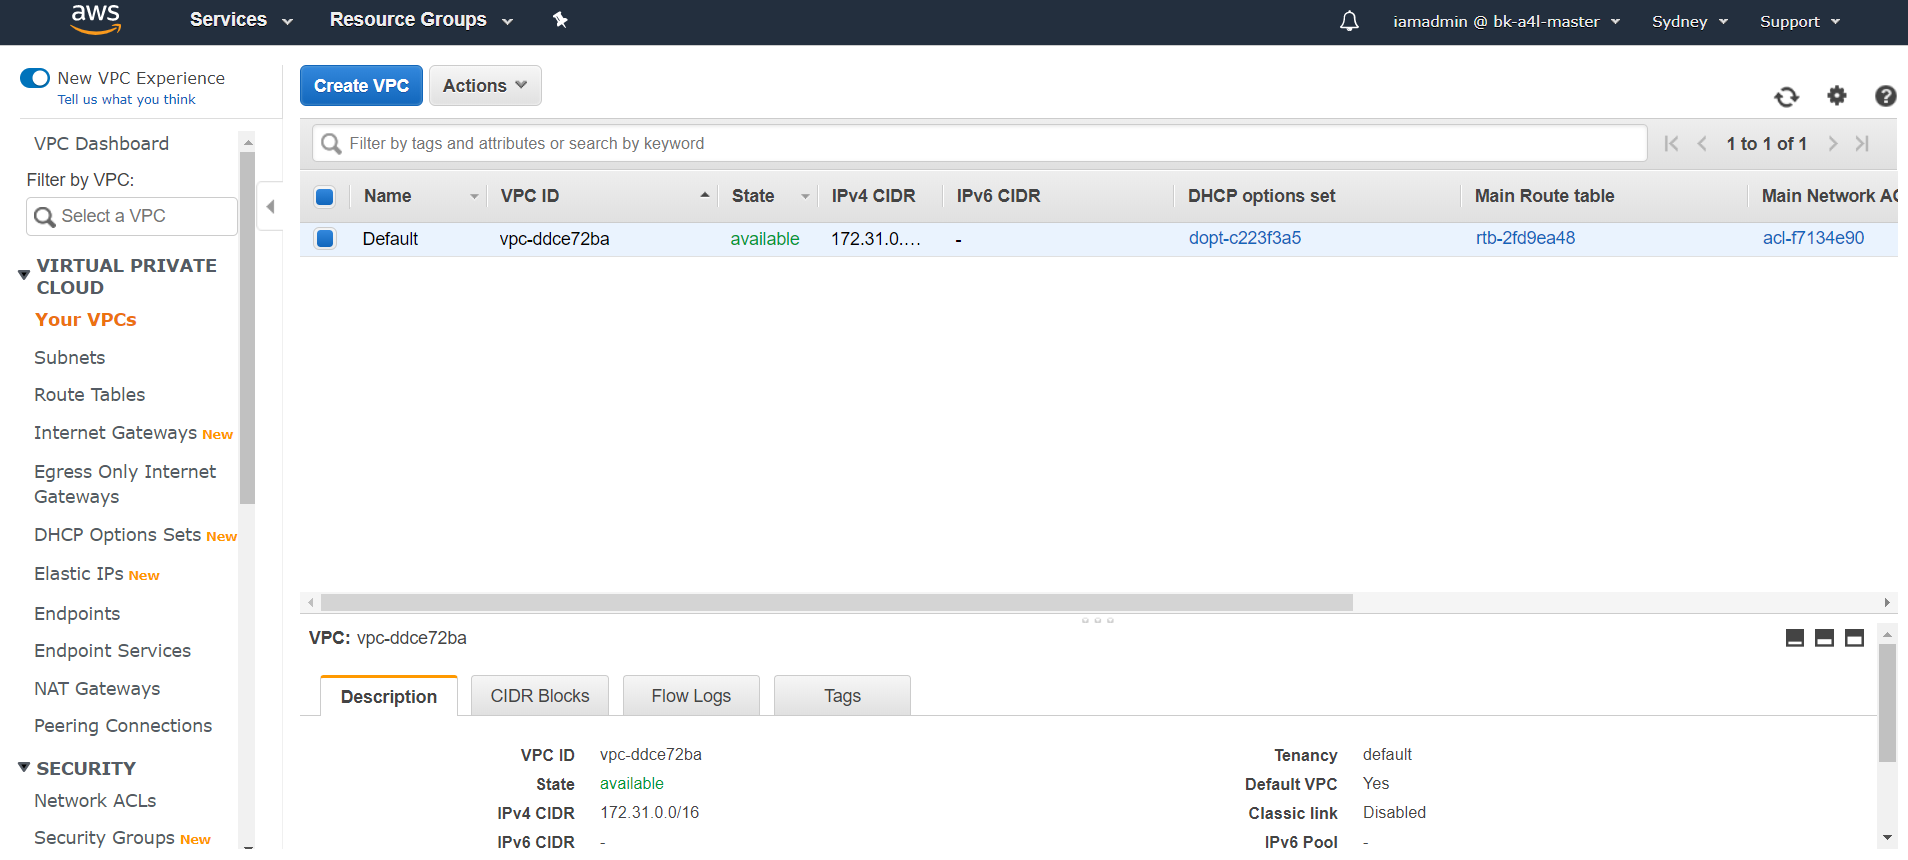
4. You can click and launch wizard or click on ‘Your VPCs’ like me.
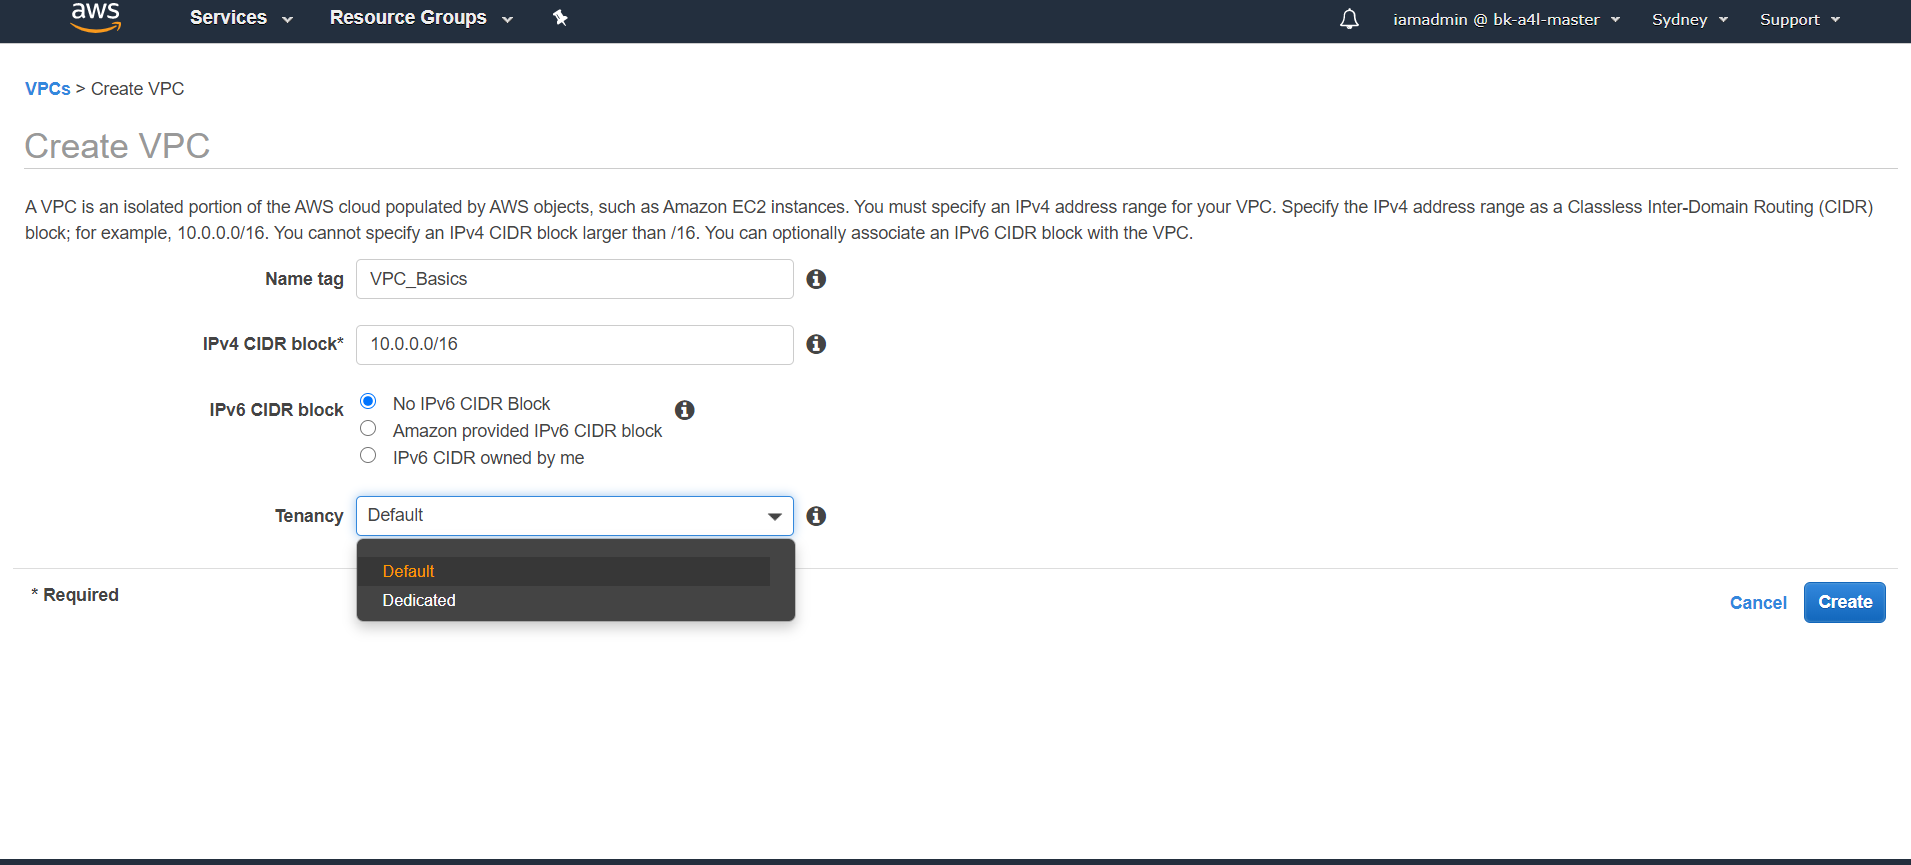
5. When your AWS account is created, default VPC is automatically created. But we will create our own VPC, subnets, route tables, IGW. Click on ‘Create VPC’.
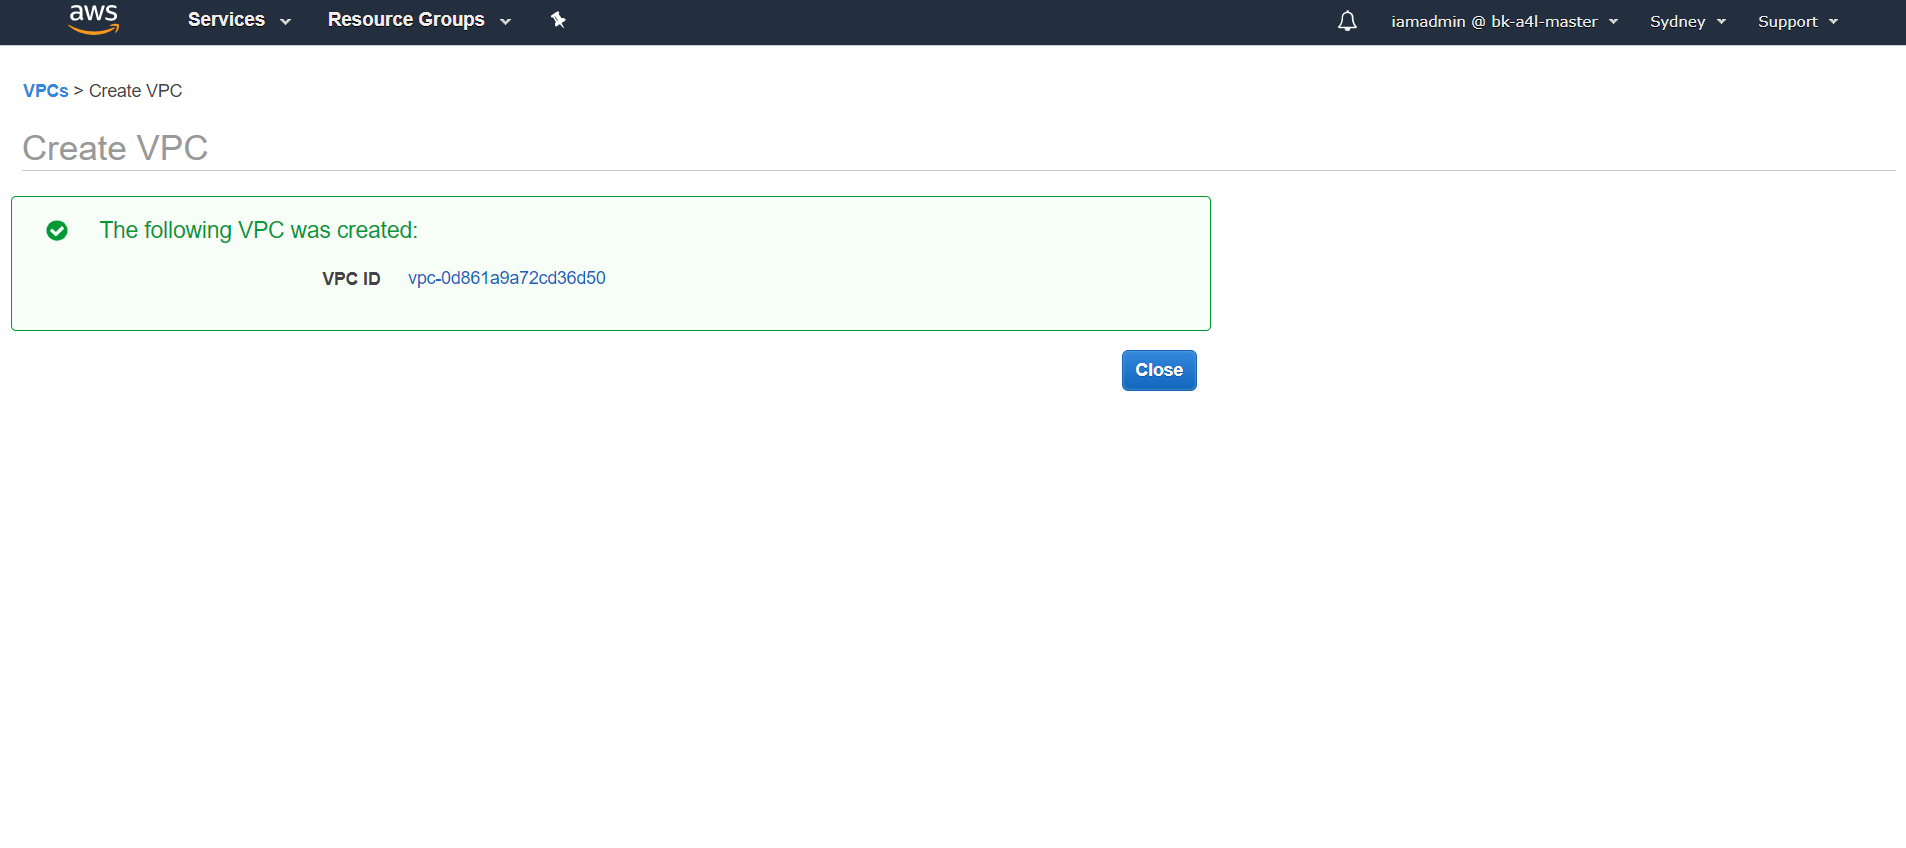
6. Use any name tag that helps you to reference later. I have used ‘Name tag’ as ‘VPC_Basic’ and choose ‘Tenancy’ as ‘Default’. Click ‘Create’.
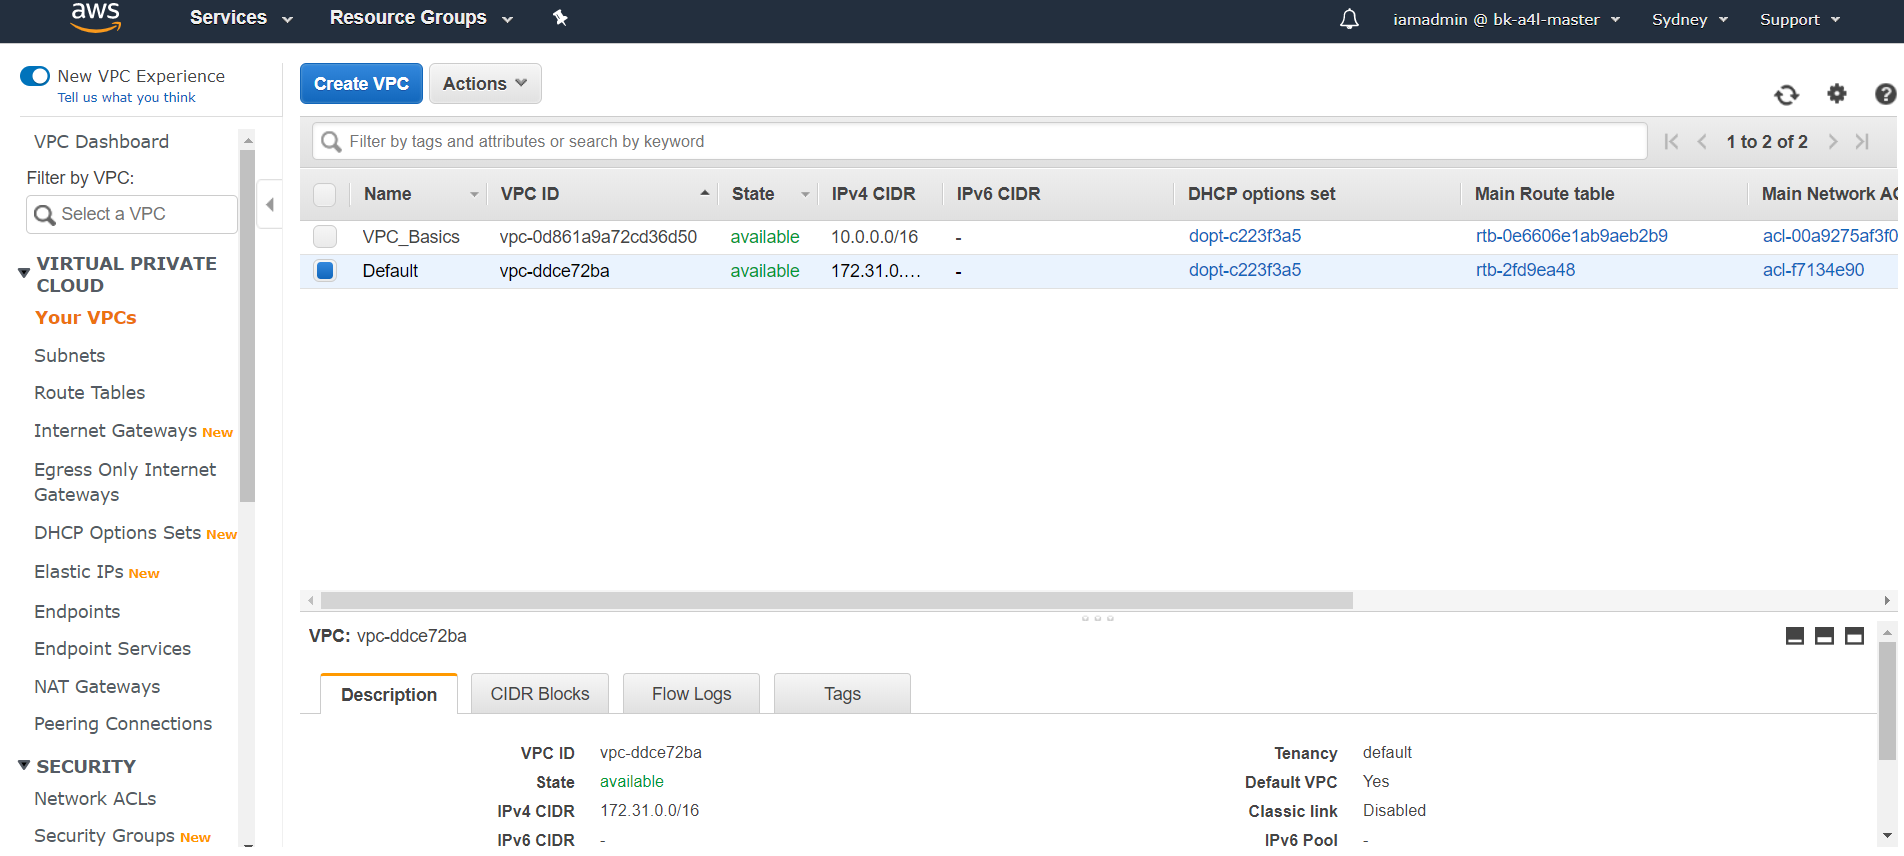
7. Now go to ‘Your VPC’ to see your new VPC.
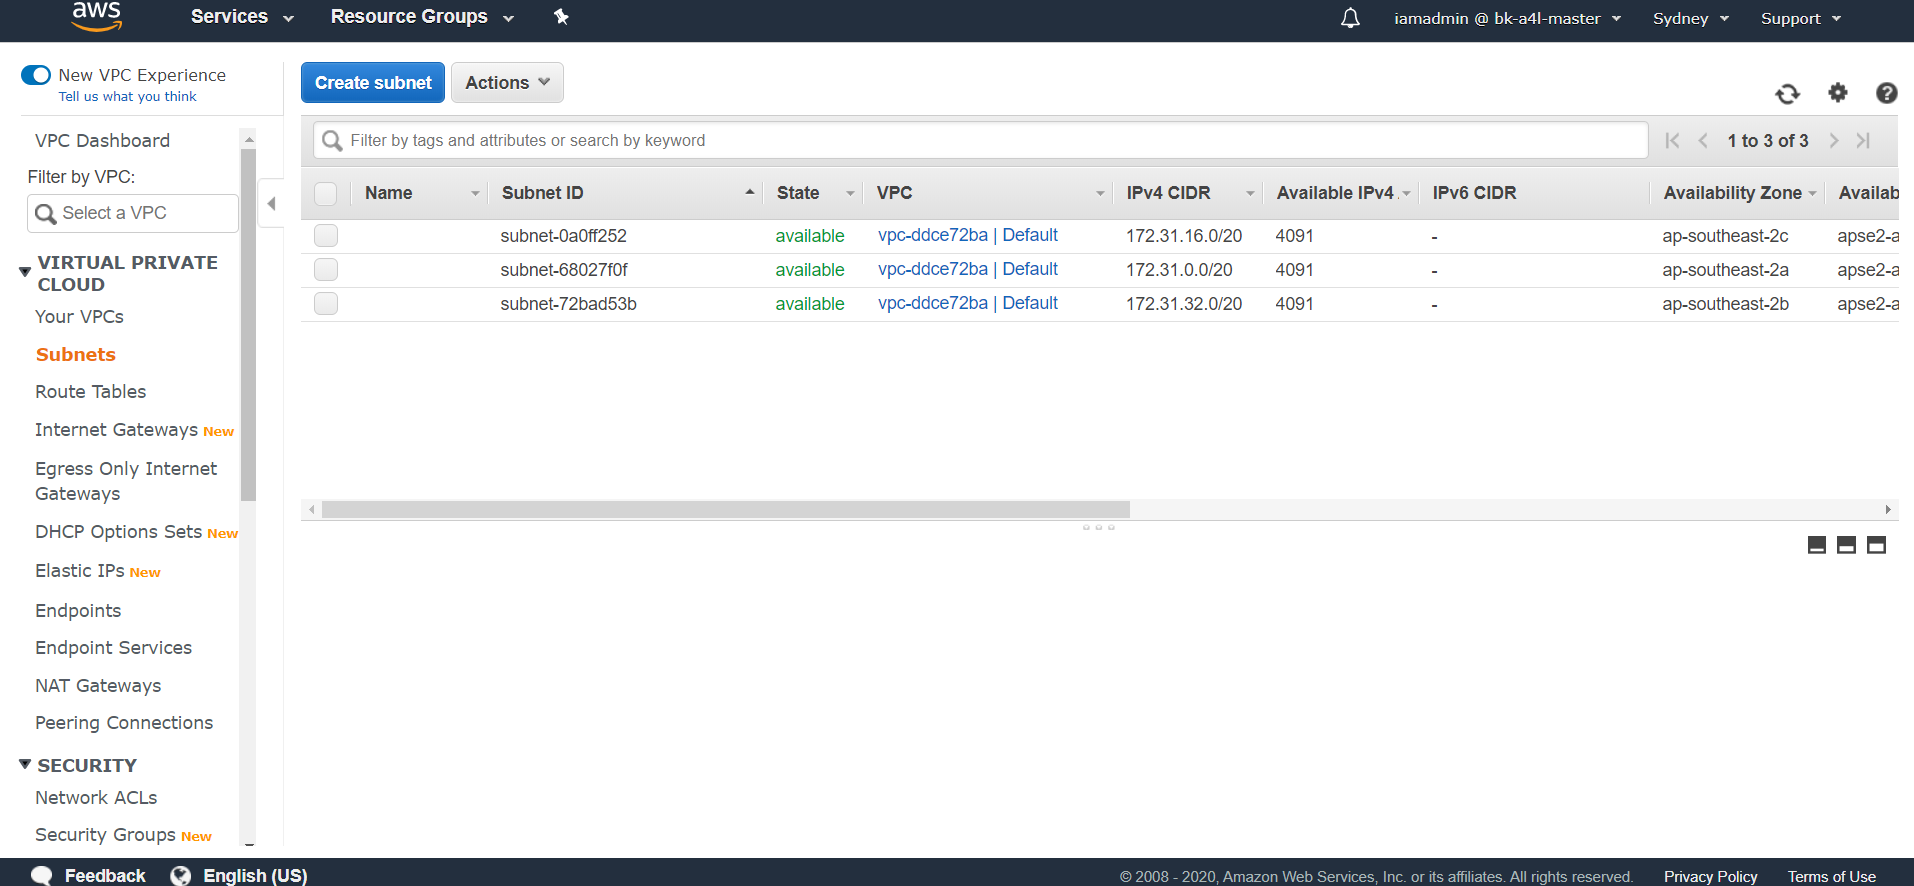
8. It’s just a VPC, and doesn’t have subnets, route-table, internet connectivity. SO, we will start with subnet. Click on ‘Subnet’ and ‘Create subnet’.
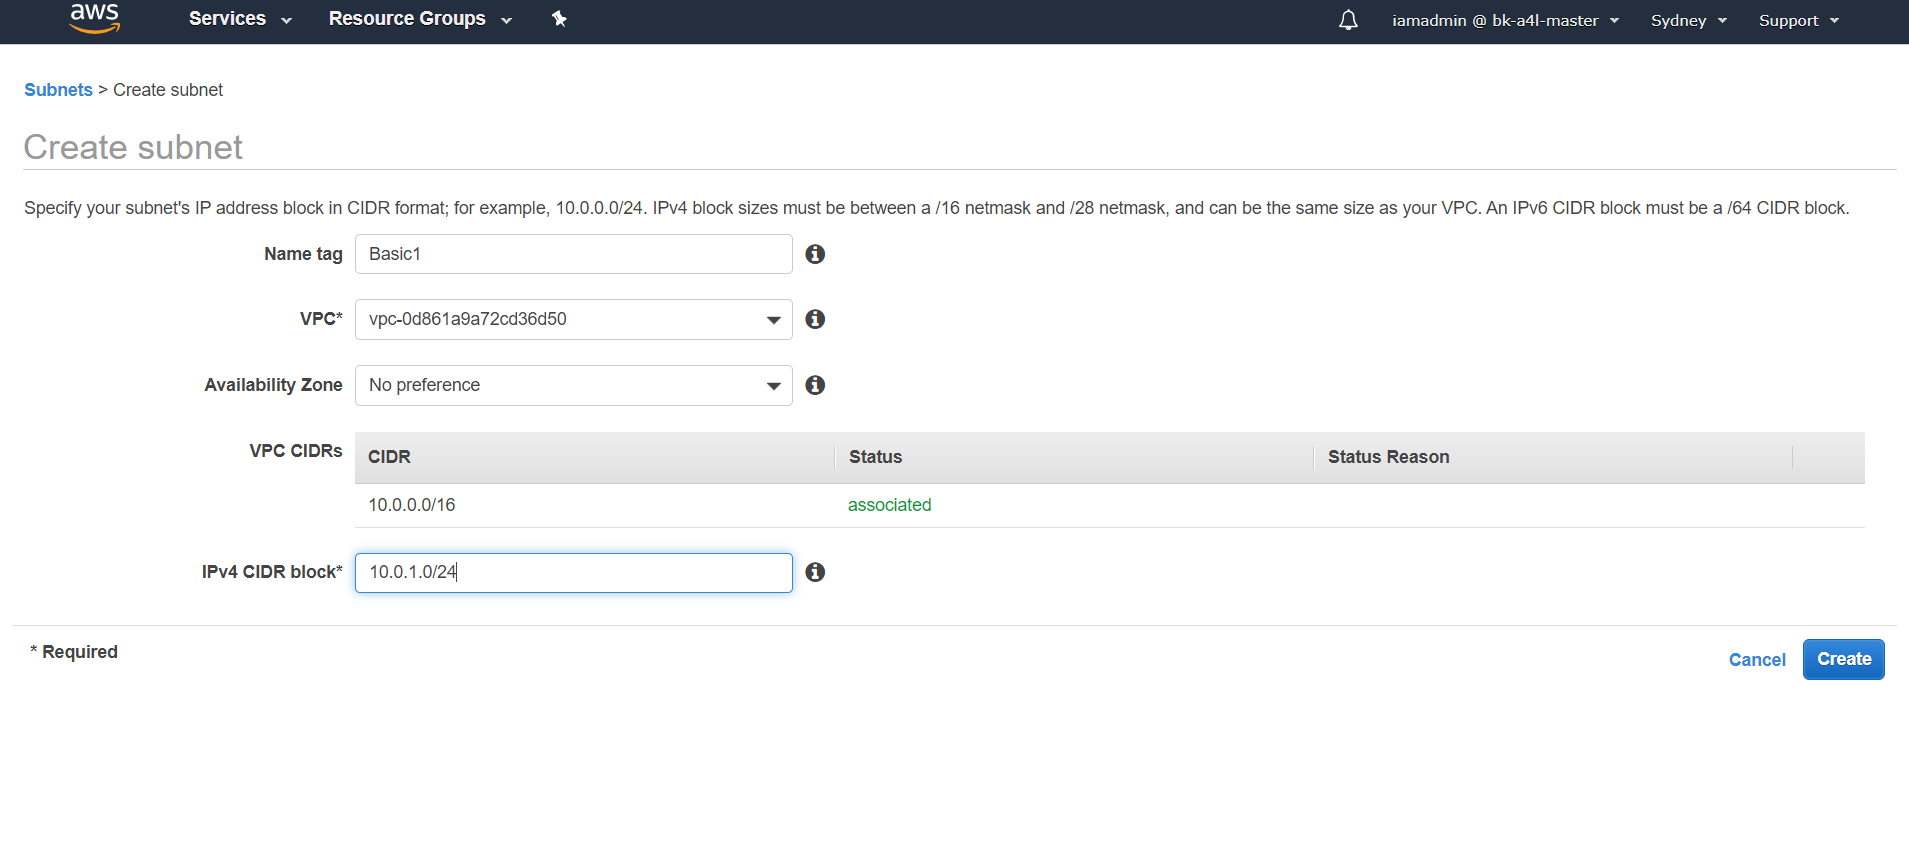
9. Choose ‘VPC_Basic’ VPC which we created earlier for subnet to be created. Choose ipv4 subnet CIDR block accordingly. 10.0.0.0/16 is CIDR block for VPC and you can create subnet CIDR block within VPC allocated ipv4 block.
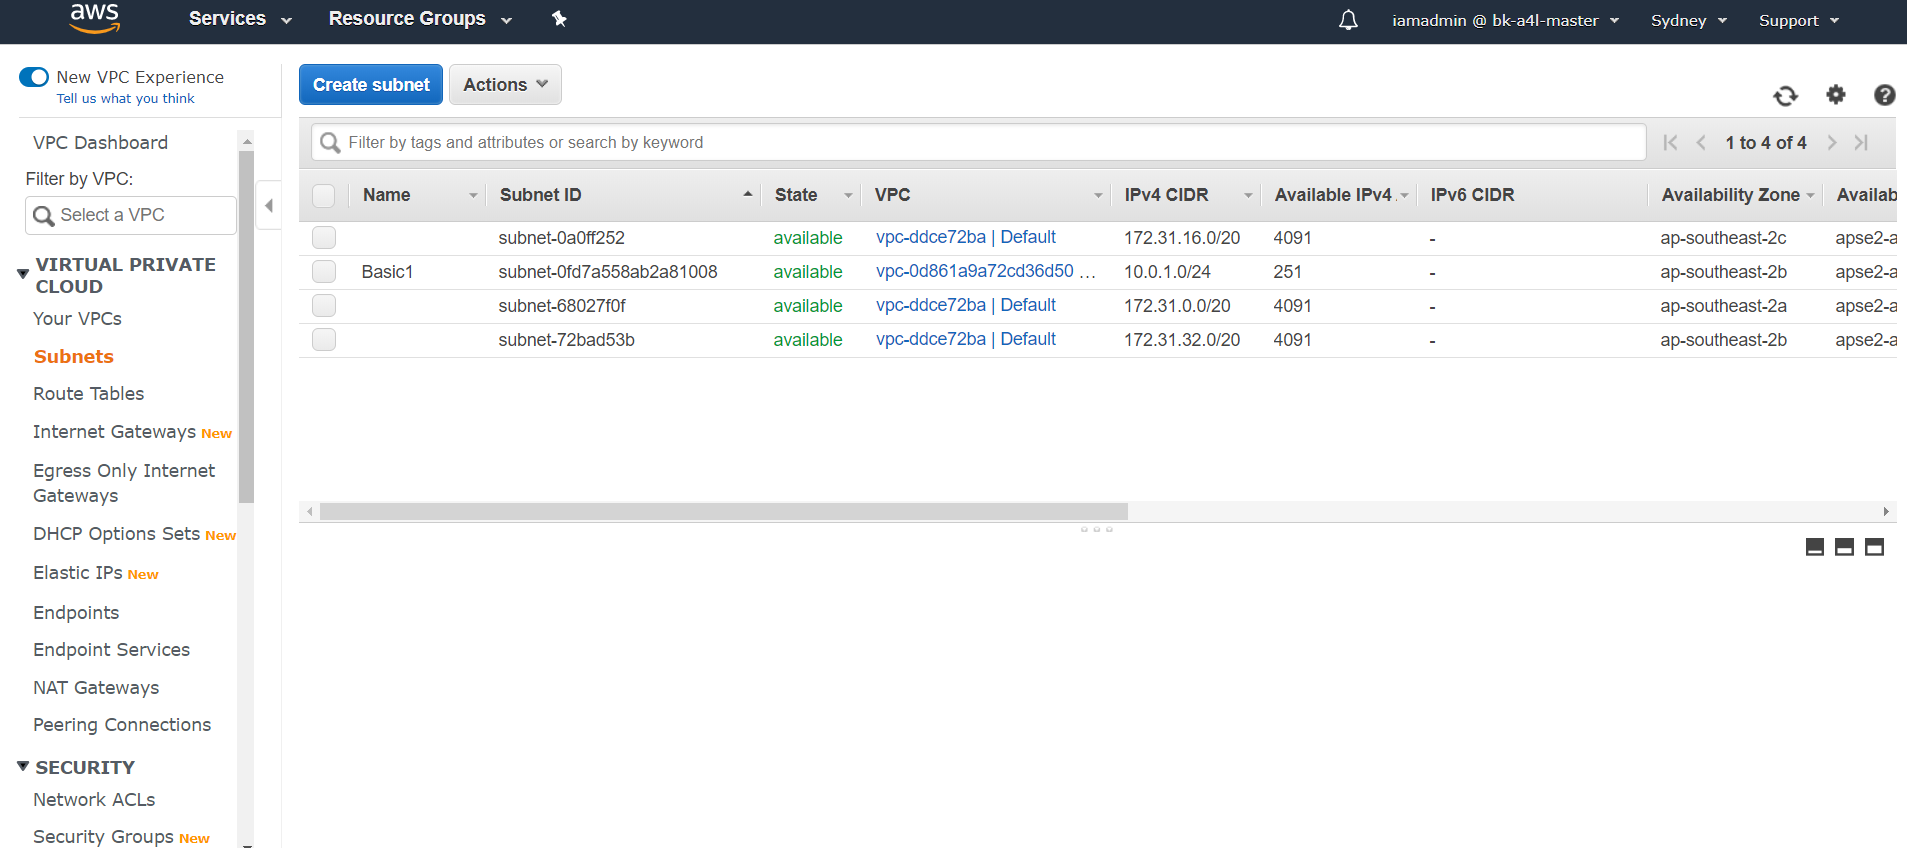
10. You can see subnet is created and has a name. Did you notice why other subnets don’t have name? They are default subnets and by default they don’t have name. You can add it though. But rarely default VPC is used in real-world.
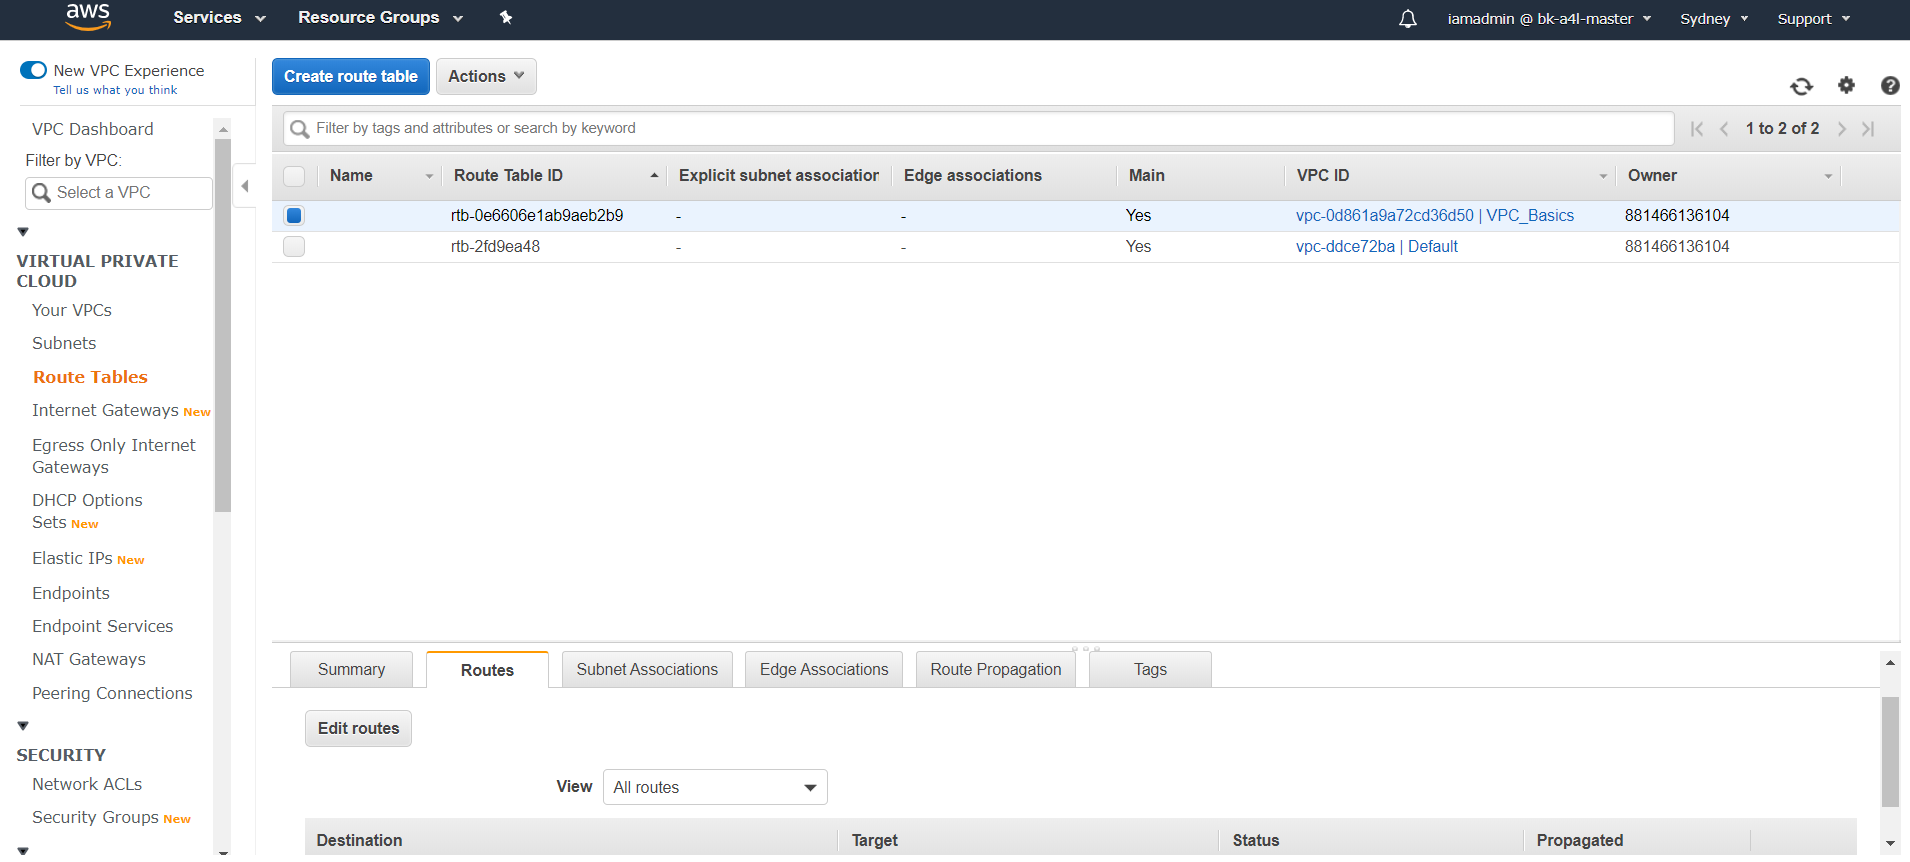
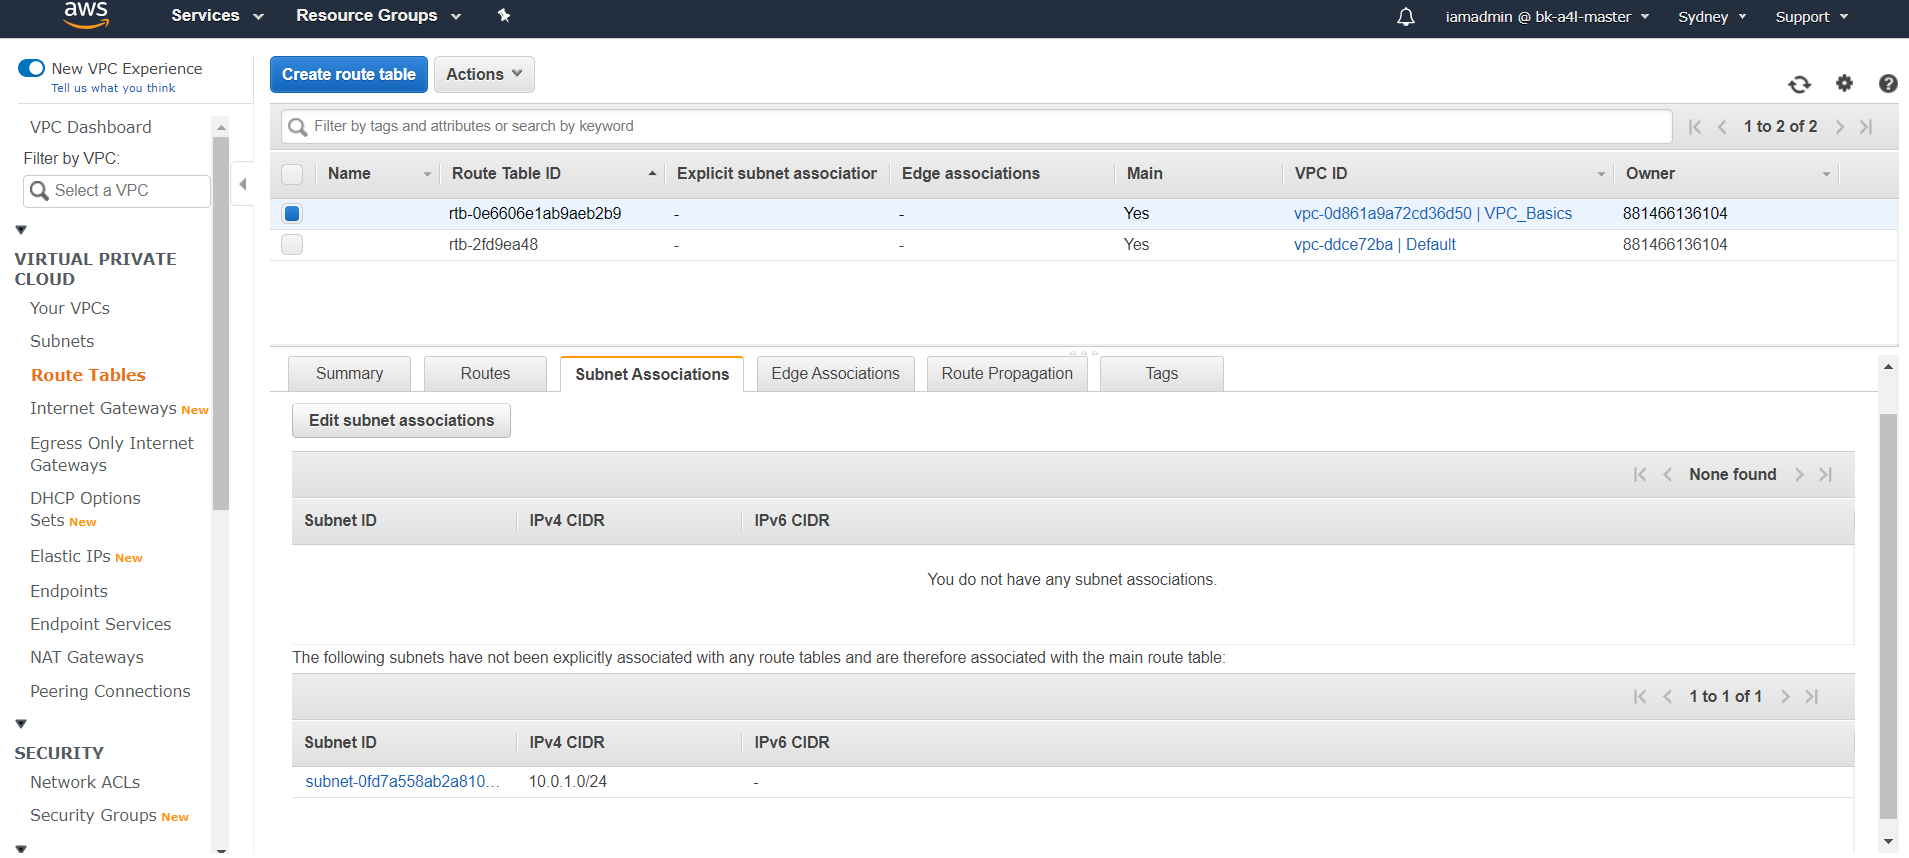
11. It’s just a subnet without route table so we need to associate a route table if resources inside the subnet needs to communicate with resources in other subnet or access internet. Click on ‘Route Tables’ and you can see 2 route tables. One is associated with default VPC and another is associated with the VPC we recently created ‘VPC_Basic’.
12. The subnet we recently created is associated with main route table (created when VPC is created). Note: -The reason is if any subnets are not associated with any route table explicitly, it is automatically associated with main route table. Click on subnet association if you want to explicitly associate a subnet to a route table.
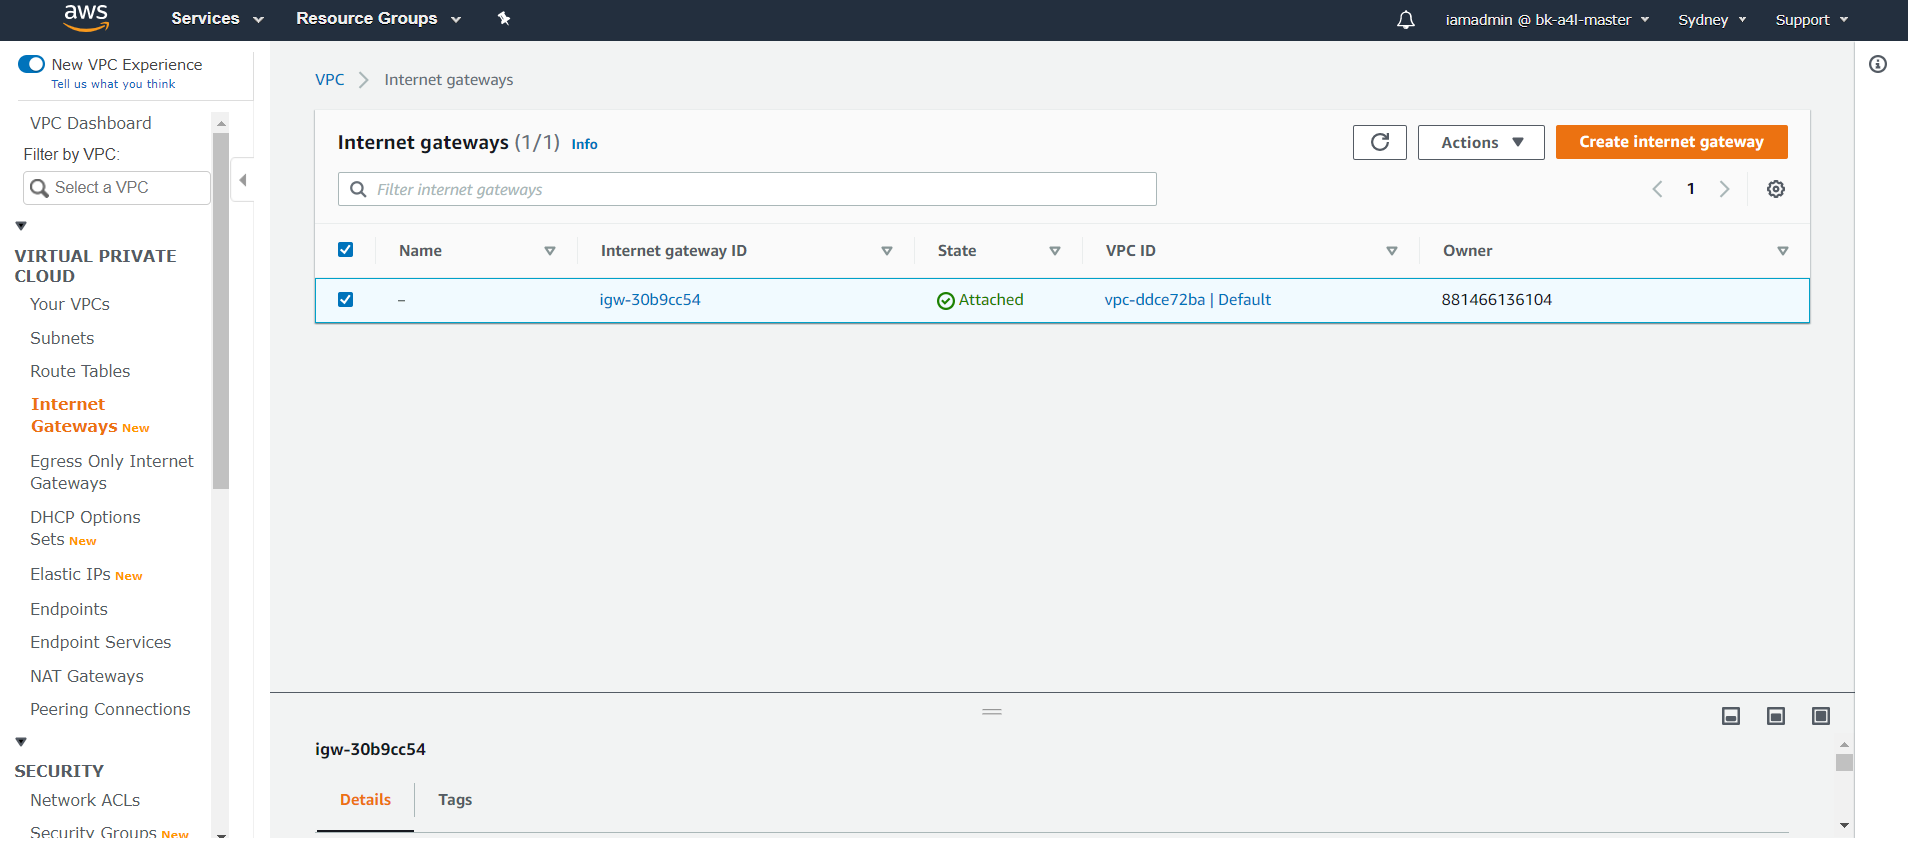
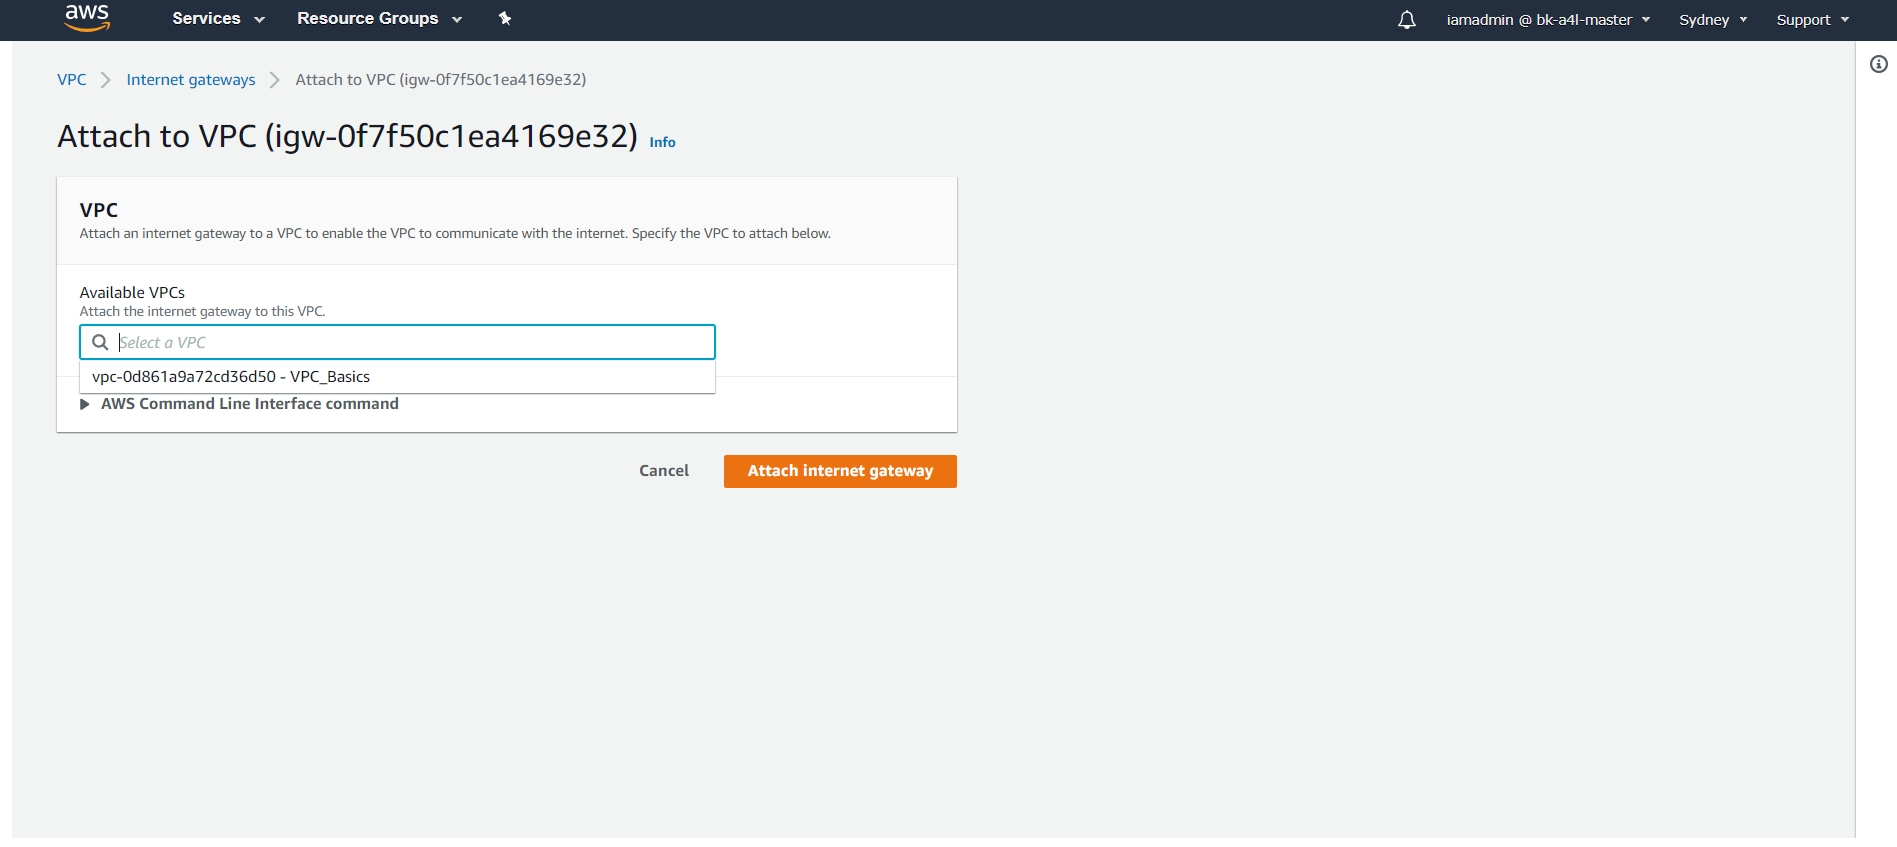
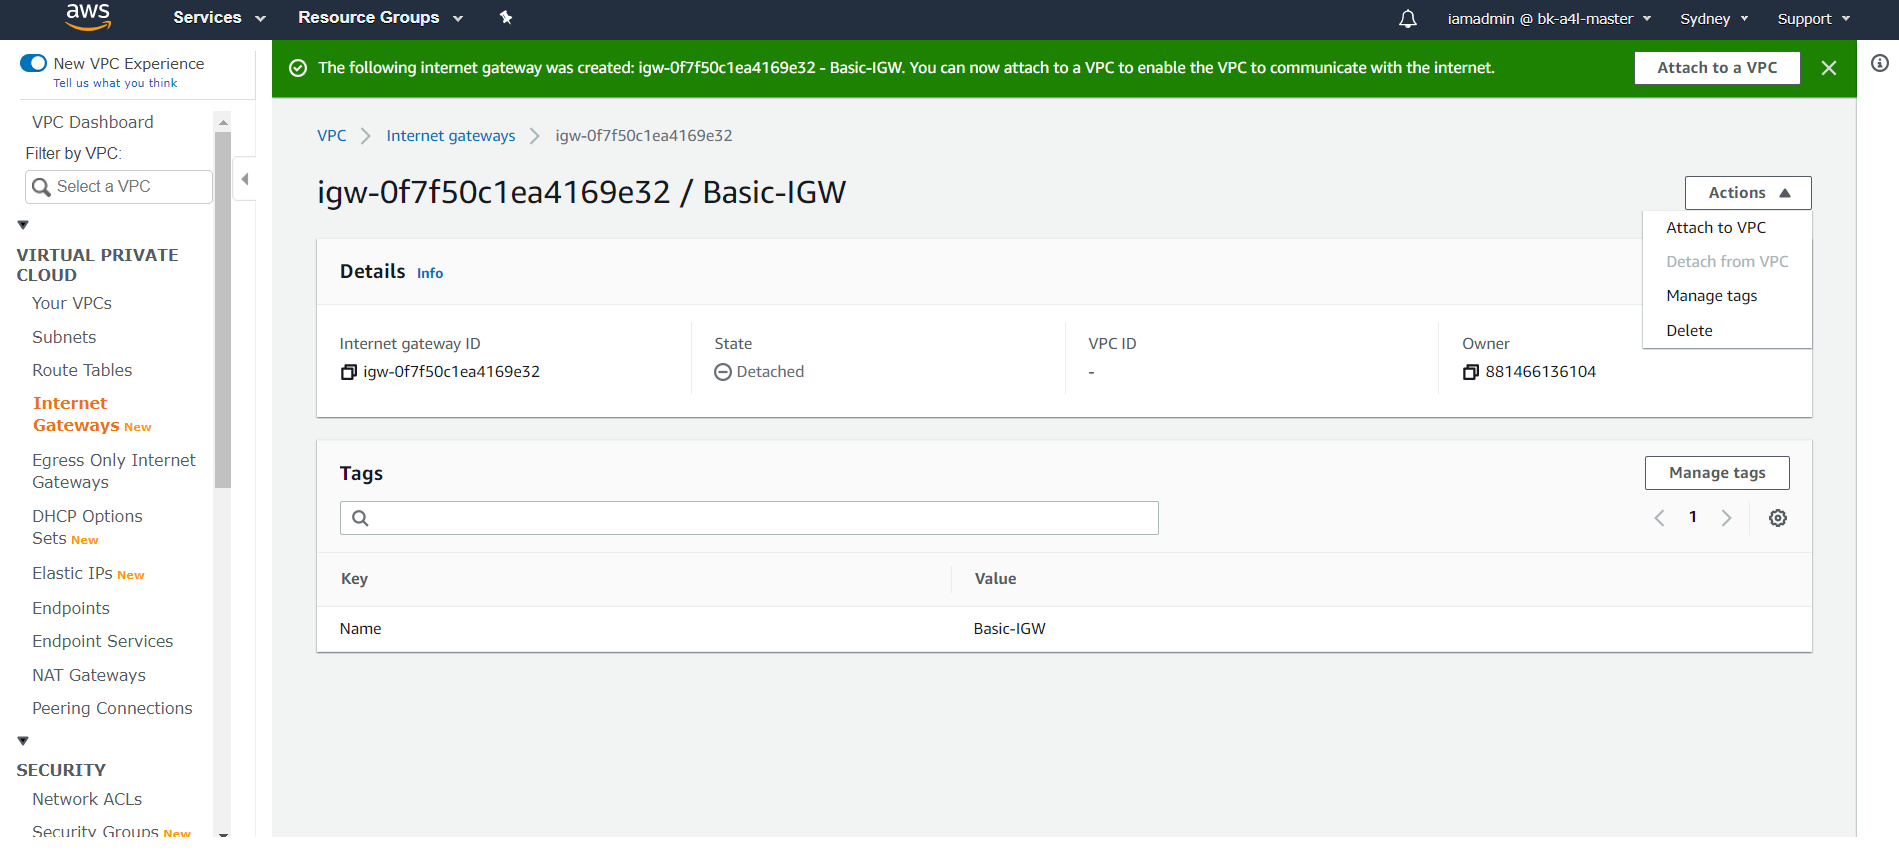
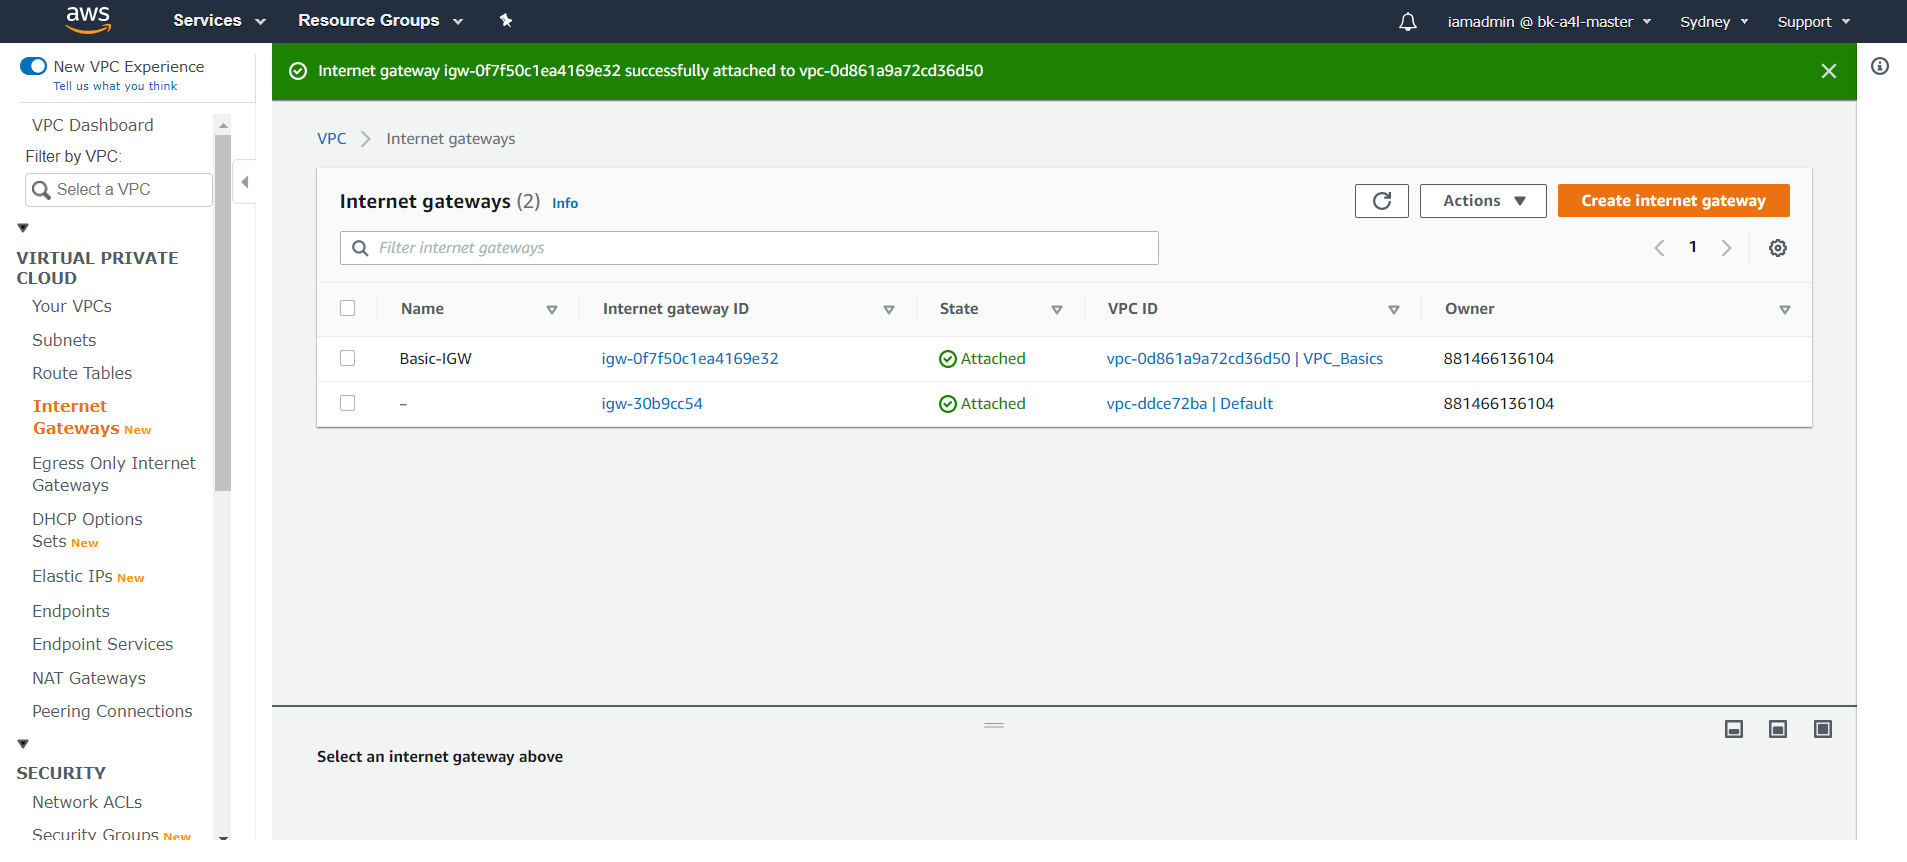
13. Now any resources inside the subnet will be able to communicate but to access internet we still need an Internet Gateway. Click on ‘Internet Gateway’ and attach it to ‘VPC_Basics’.
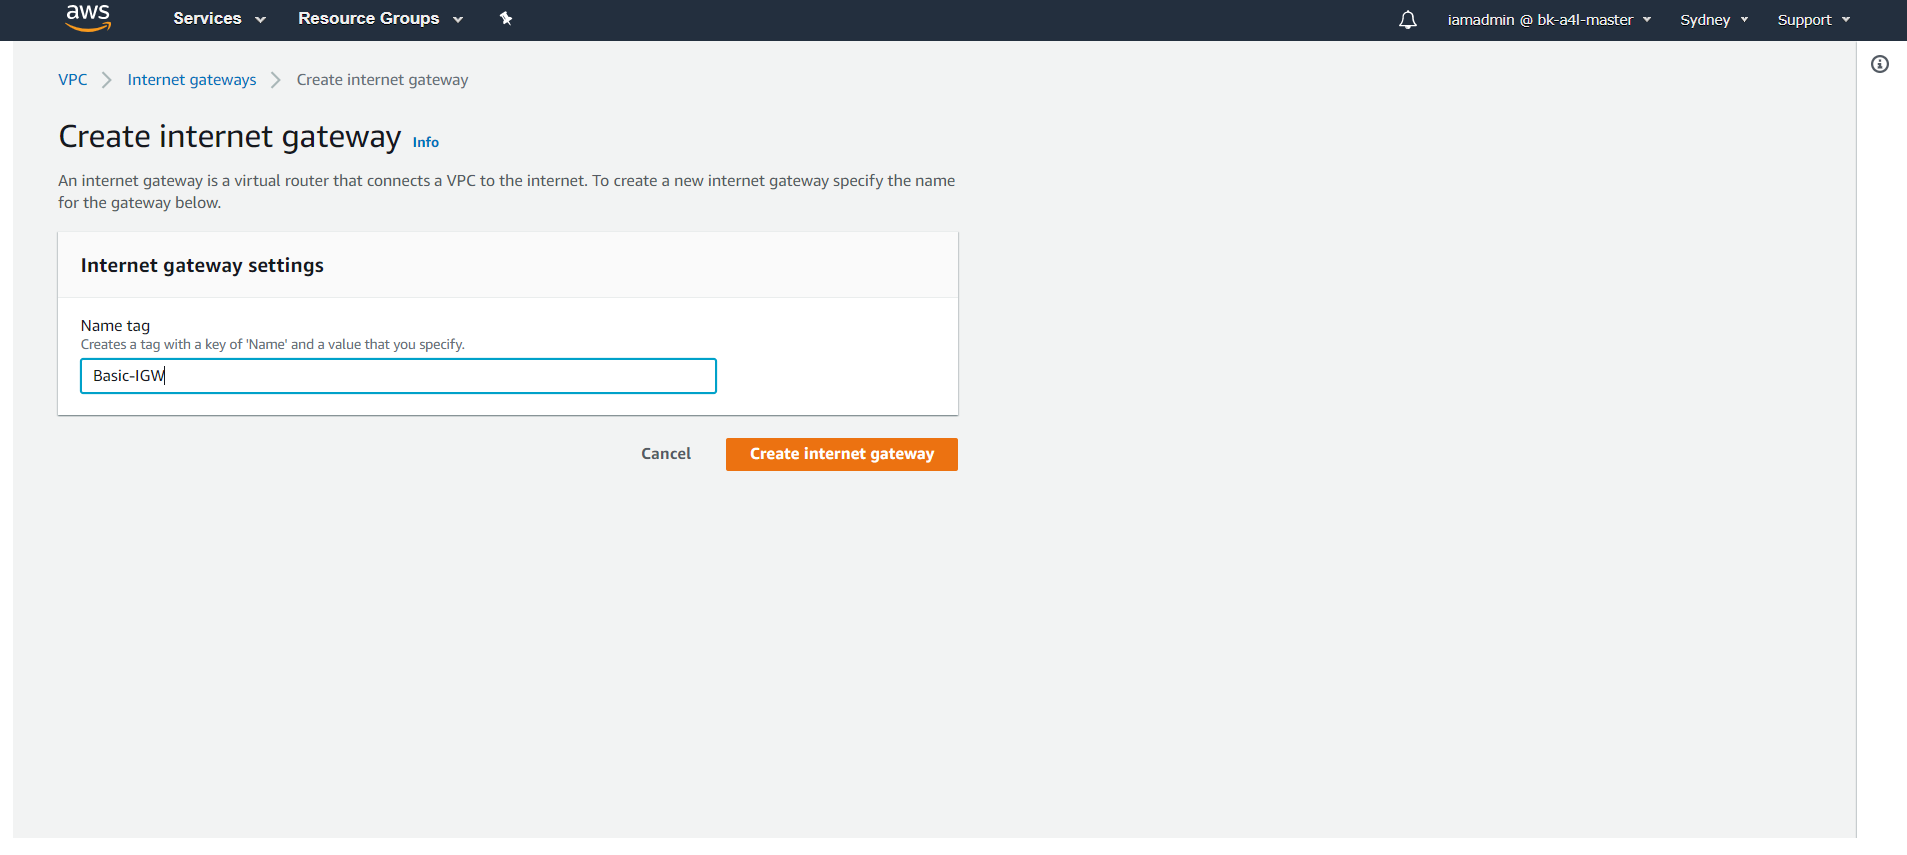
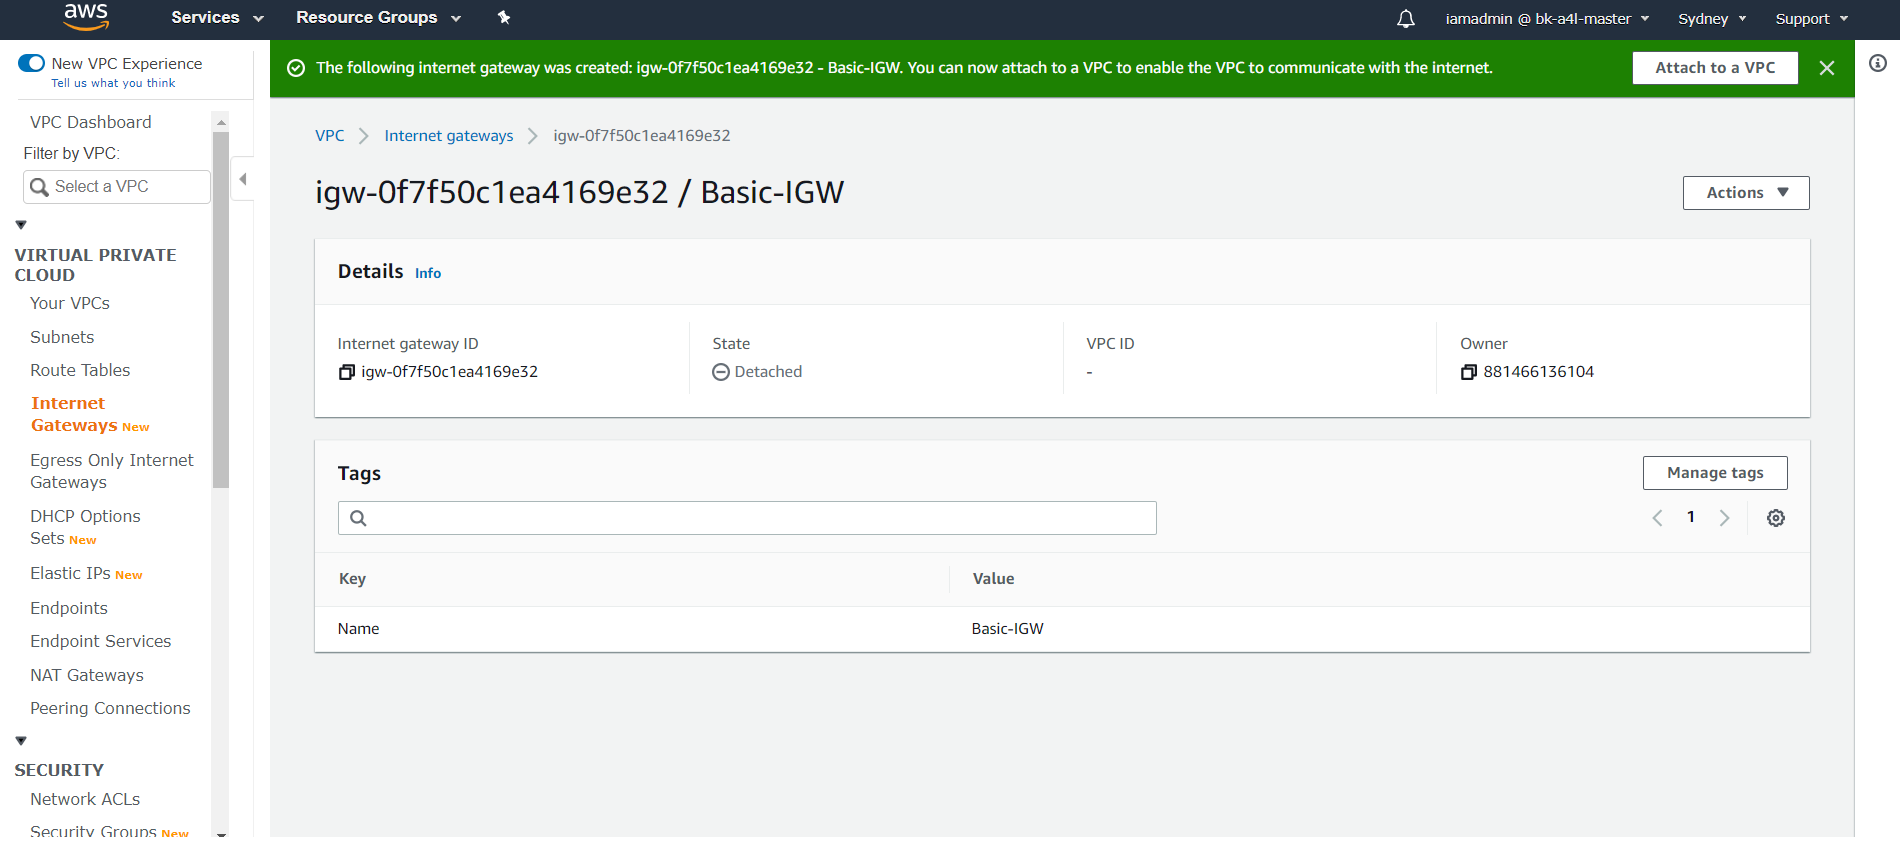
14. Click ‘Create internet gateway’. And after it is created attach it to a VPC. In drop-down menu you will only see VPC that aren’t attached to a VPC. ‘VPC_Basics’ in our case.
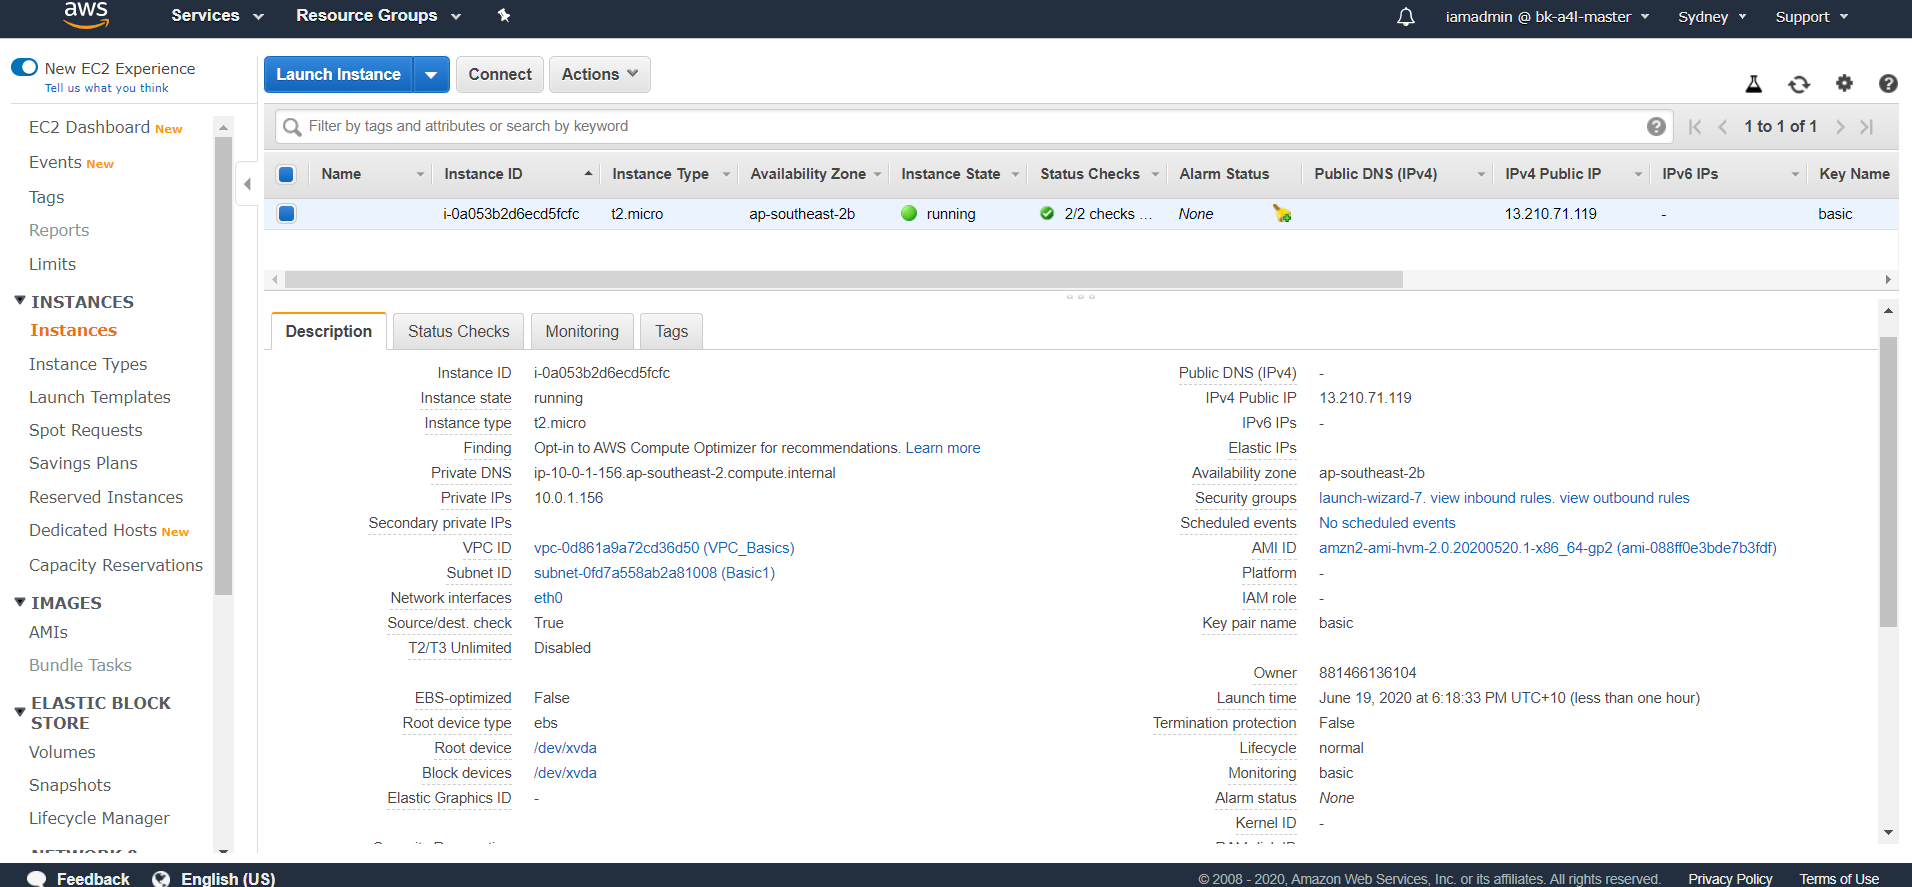
15. Now to verify we have network connectivity, I have launched EC2( Linux virtual machine in this case) inside ‘Basic1’ subnet.
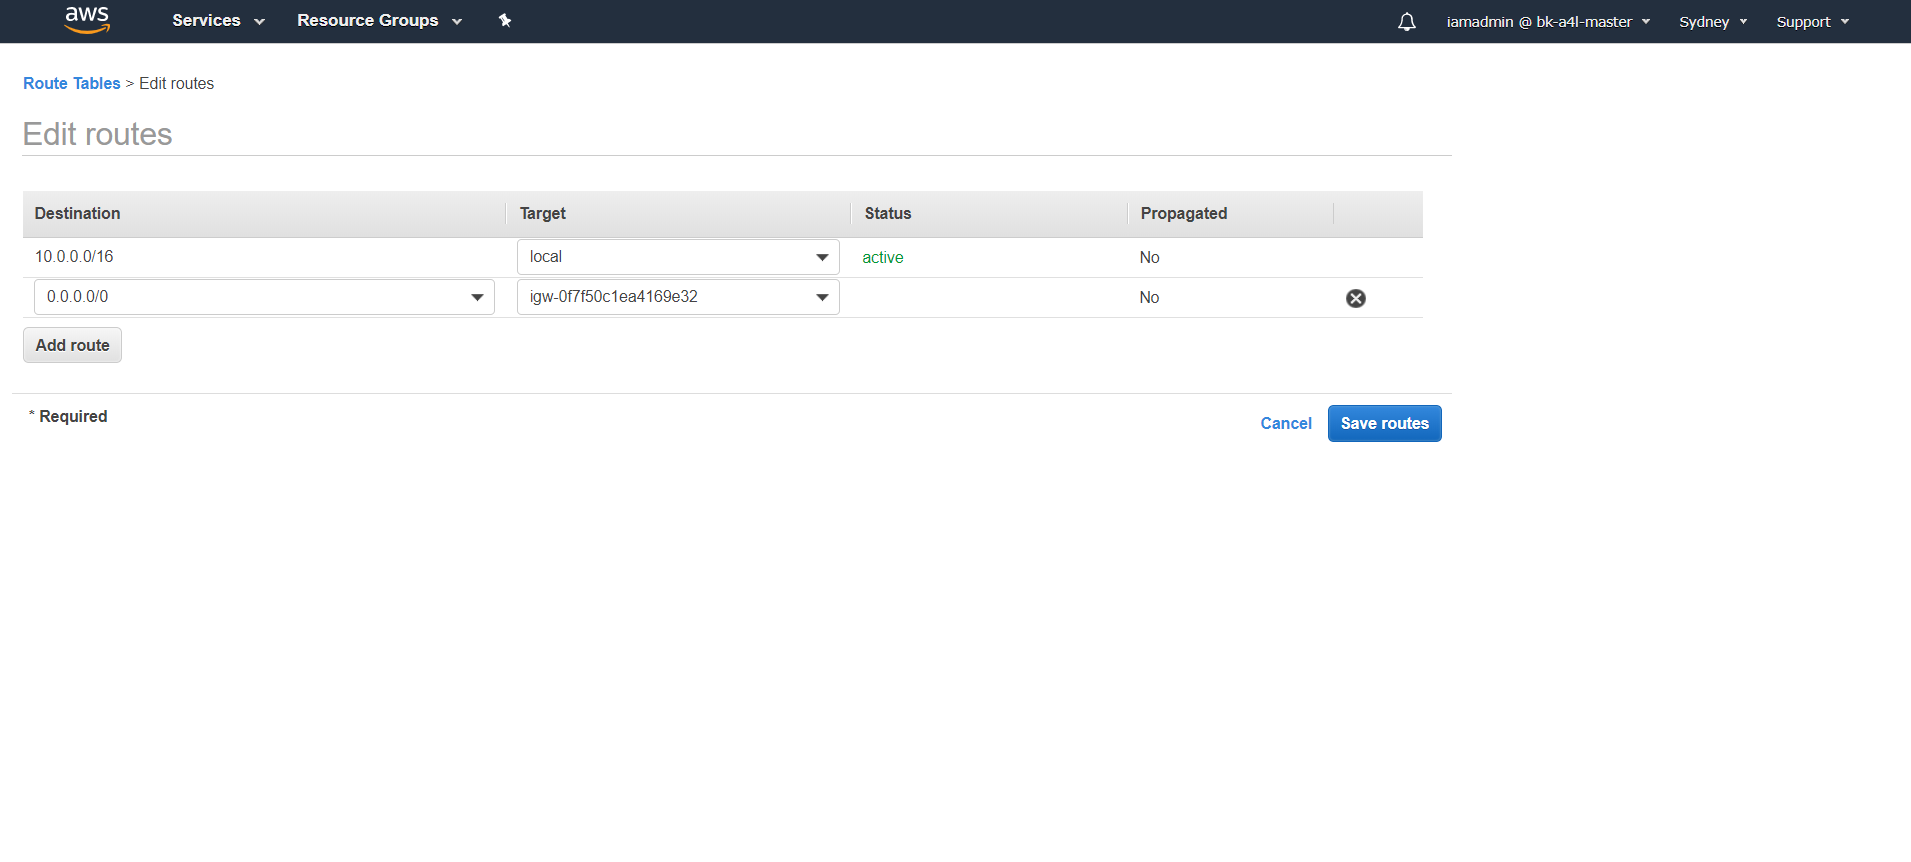
16 .I will access the EC2 via cli and ping google DNS to see if it is successful. I couldn’t connect to the instance. What might be the reason? We forgot to add default route forwarding towards internet gateway. You can go to the route table and edit the routes.
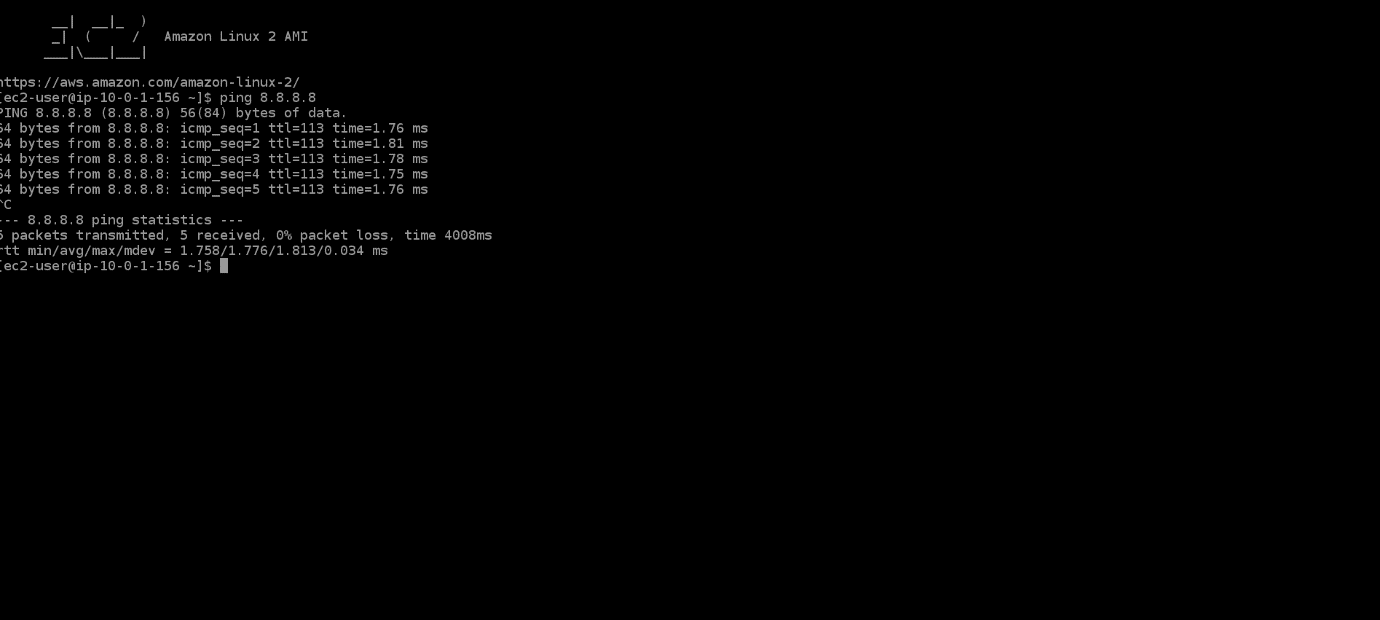
17. I can ping the instance from my local device and from instance I can ping google DNS server.
Note: - Do not forget to delete all the resources that you created. Thank You!
Bijay Jung Karki is a Cloud Support Associate(Networking) at AWS who helps customers troubleshoot problems in their cloud networking and offer best solutions. He has earned a Bachelor degree in Network Security from TAFE. The passion in emerging technologies has been a driving force in advancing his career.
Get connected with Bijay:



0 Comments